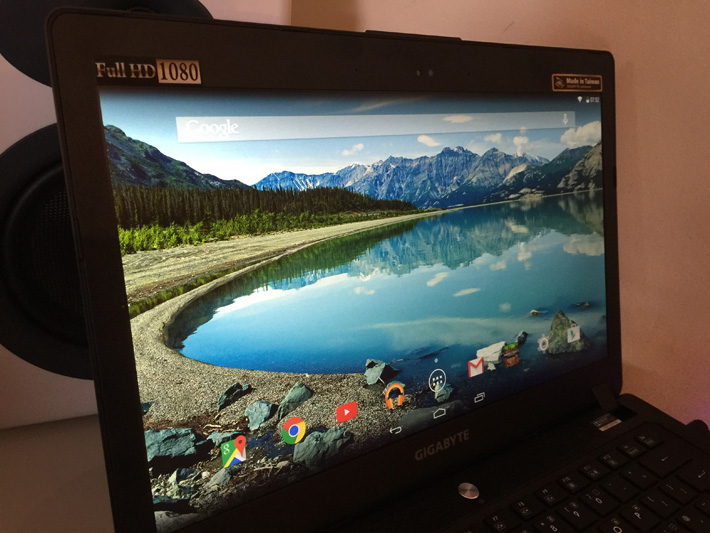
Android is pretty good for phones and tablets, but how does it work on a laptop? Surprisingly well, actually. If you’d like to try the free OS for yourself, you can take advantage of the Android-x86 project, a cooperative effort that brings Android support to desktops and laptops running x86 processors. You’ll get access to the same Android apps that you’ve installed or bought on your Android tablet or smartphone, and benefit from a slick OS that runs quickly on even dated devices. You likely won’t have a touchscreen to use, but Android still supports trackpads, keyboards and USB peripherals just fine. It seems like a fair trade, and if you’ve got an old laptop sitting around then it’s a fun experiment to try.
A few years ago I covered the install process for what was then the latest Android-x86 release, which was 4.0 Ice Cream Sandwich. Since then, Android-x86 has been updated to follow each major Android release, and now sits at version 4.4 KitKat. (An update to 5.0 is planned too.) With that in mind, I thought I’d revisit Android-x86 to see how far it’s come. Why don’t you join me? Here’s what you’ll need to do.
Part 1: Preparation
First, you’ll need to prepare your materials. You will need:
- The latest ‘live & installation’ ISO file from the Android-x86 site. I am using Android-x86-4.4-r2.iso.
- UNetbootin (downloadable here)
- A USB stick with 1GB or more of storage space (I used an 8GB stick)
- A working computer to prepare your USB stick (Windows, Mac & Linux are all fine)
- A computer with an Intel x86 or x64 processor (could be the same computer as in step 4).
Now we have to prepare our USB drive. Plug your drive into your computer, and format it to the FAT32 file system. You will lose all data on the drive, so be sure to back up anything of value before you perform this step!
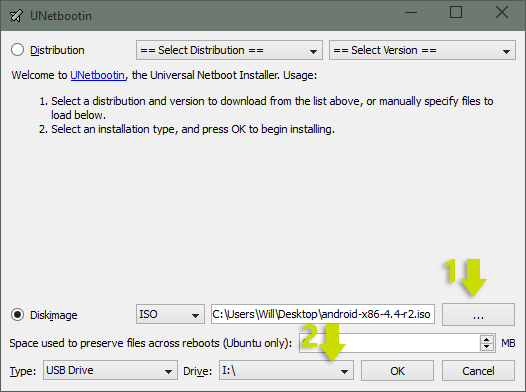
Once the format has been completed, start UNetbootin.
Click on the button with the ellipses near the bottom of the screen, and select the ISO file that you’ve downloaded. Then, select your USB drive from the dropdown menu at the bottom. Make sure your selection is accurate! When you’re ready press OK. Android-x86 will be copied to the USB drive, and the drive will be made bootable. When it’s complete, close UNetbootin and remove the USB drive from your computer.
Part 2: Boot from the USB drive
Now we need to boot into the USB drive from our target computer. Plug in the USB stick and turn on the computer (if it is already on, restart). In order to boot from the USB, you’ll need to make sure it is the first device that your computer attempts to boot from.
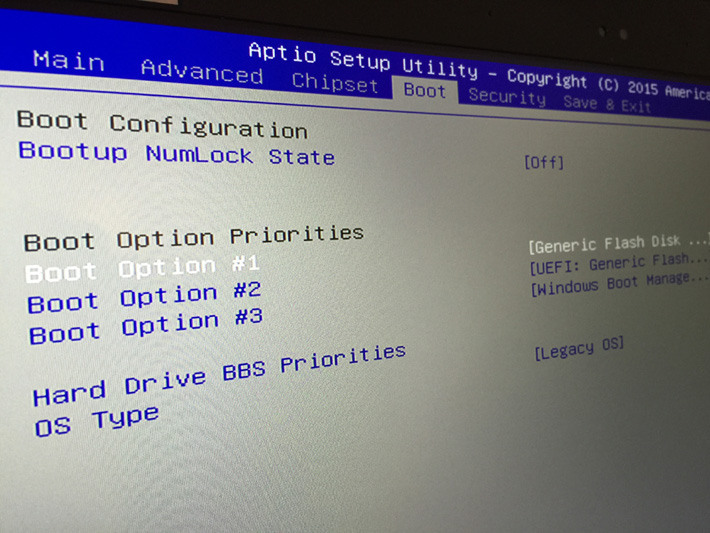
You can do this by pressing a key as the computer turns on. The key is different on different computers, but common keys include F1, F2, F10, F11, F12 and Delete. The hotkey will usually flash on the screen as the computer first boots, or can be Googled with the phrase “[name of motherboard / computer] BIOS key”.
Enter the BIOS and change your boot order so that your USB drive comes first. You may also need to make some changes to ensure the drive is recognised on newer devices – for example, I had to change to a ‘legacy boot’ instead of ‘UEFI’ on my laptop. Make your changes, then press F10 to save them and reboot.
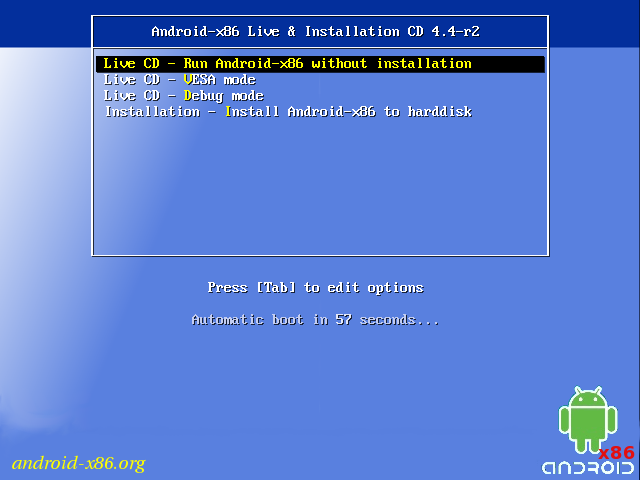
If all goes well, then you should see a screen like the one below. You will have several options here for installing Android-x86, but I recommend you choose ‘Live CD – run Android-x86 without installation’. This will let you try out the OS to see if it works well on your machine, without messing up your currently installed operating systems.
If you do decide to install, you’ll be asked to choose which drive you’d like to store Android-x86 on. Choose your drive, then choose the maximum size when asked how large you’d like to make the installation. This will provide more space for programs later on.
Whether or not you chose to install Android, after a few seconds / minutes you’ll be into Android proper!
Part 3: Android!
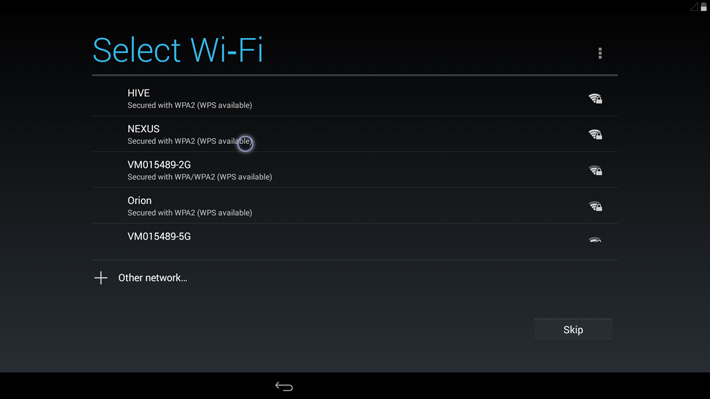
If all goes well, then you’ll see the Android logo, then a setup screen. As this is the first time you’re booting into Android-x86, you’ll need to go through the same setup process as on a real Android tablet. You’ll be asked to join a wireless network, sign into your Google account, and all the rest of it. With luck, your wireless card, keyboard and trackpad will all work during this stage. I had no issues here, so hopefully the same holds true for you.
Once setup is completed, you’re free to explore the OS! Android-x86 comes with the Google Play Store, so you can access this and download any apps that you like. Some apps won’t be available for install (or will crash immediately), so it’s worth testing out your favourites.
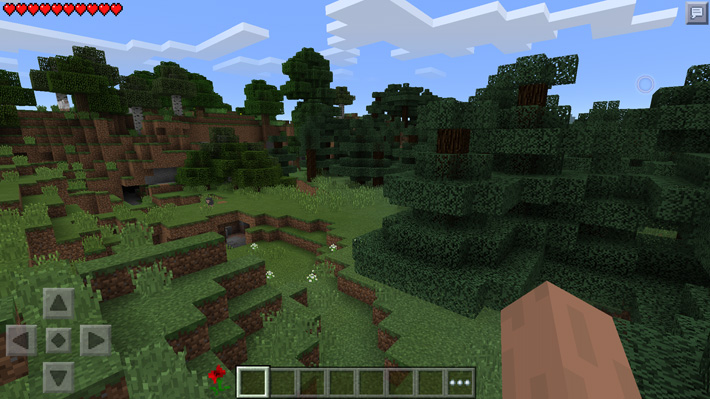
I installed Chrome, Google Music and a few games, including Minecraft Pocket Edition. Not all apps and games work well, but those that I tried seemed OK!
Questions? Comments?
I hope this guide worked for you. Let me know if it did in the comments below, and if you’re having problems I’ll try to help you if I can!
Would you rather install Android as a virtual machine? Click here.

If you plug in a mouse, it should work — what is the current behaviour?
Answering my own question – NC10 and RemixOS – work great together! All the benefits of Android x86 with tweaks for use on laptops.
Sorry for the bad news, but I’m glad you discovered what the problem is at least.
I looked it up, it appears the CPU – an Intel Atom Z500 series, doesn’t have x64 and x86 capability. For no goddamn reason. I guess that seals my netbook’s fate. Thank you for your replies.
Perhaps your machine isn’t compatible with Android in one way or another, then.
PS: The CPU error I got was when I tried to install the 64 bit. When I installed the 32 bit, it still booted, even though it said there was an issue with CPU incompatibility. However, it’s stuck on the welcome screen – it just says Remix OS in pretty script that has some sort of bright/darkening effect, and that’s it. One problem after another.
PPS: I rebooted and this time Remix OS came online, asked me to pick me a language and set up WiFi. It’s laggy as hell though, and the mouse is very glitchy/jumpy. Plus the screen isn’t framing correction – the resolution is off. Not really sure what to make of this. Is it my USB?
Hmm, try http://www.jide.com/remixos :)
Hello. I am trying to install this on a Dell Inspiron Mini 10 netbook. I downloaded Android version android-x86_64-6.0-r1.iso. I went into the BIOS in the netbook and put the USB priority first. Now I got this after reboot (below) and I am stuck. Advice please?
http://imgur.com/a/lBDtS First image is boot up, and second option is what happens if I hit tab. I tried a bunch of commands like run.exe but it just stays there. The “auto reboot in x second” thing just loops over and over. Thanks!
It’s difficult. You might try a dongle, but the odds aren’t great. Try what you have, don’t but anything specially. Maybe look at remix OS if you haven’t already.
Hello,
I dont have built in wifi in my lap..instead i use a nano adapter…how can i access internet either by dongle or wifi nano usb?
No problem, happy to help!
thank you very much!!!got messed up with this GRUB!!!
Step 2 here should help: https://www.techmesto.com/uninstall-linux-grub-dual-boot-windows8/
how to remove the gui that splashes while booting…i want to restore everything back normal and going to work on android in a virtual machine…so how to remove the gui that displays the options for the booting…
I’m not sure, maybe try asking on http://android.reddot.com?
after downloading the app there is ann error that is unable to installing this app
Hmm, I’m not sure what to suggest. What error are you getting? What exactly is happening?
yes
apkmirror.com?
please help i cant download anything from google play neither install any app but on live cd its working normal without any proplem HELP!
I’ve been trying to install this without luck — where do you put the disk on the phone?
Pretty sure I have, but will double check tomorrow.
Have you changed the boot priority back to the hard drive in the bios?
I have followed every step to the letter for a native install. Netbook will ONLY boot android if the thumb drive I used to install it is plugged in. How do I install android so I don’t need the thumb-drive?
If I change the boot order, android doesn’t come up and the netbook tells me to put in the boot disk
I ran into the same problem when I wanted to install Android,No matter which way i went about it I only managed to get 2gbs of storage available to me it wasn’t til later on that i reralized that the format the install option had given me wasn’t formatting my partition correctly, and even through it was showing as Ext3 it really wasn’t.
I overcame this by download a programme called ” MiniTool Partition Wizard ” which acturally did what the Android installer couldn’t. So to answer your question….You need to format the drive you wish to use to install Android to Ext3 using Minitool, this will give you the max storage of your drive that your looking for. When it comes to installing follow the instructions of the installer but choose not to format when the option comes up.
Hope this helps!
Hmmm — it sounds like the build you’re using of Android-x86 isn’t quite working (obviously). Try a different release of the project if it’s available, or maybe Remix OS? I haven’t encountered that error and I can’t seem to find any solution by Googling. Good luck, let us know if you find a solution!
yes, thanks. I’ll keep persevering. What was that message all about!
Cheers
Hmm, that’s too bad. It may be worthwhile to try a new alternative, which should be released in the next week. It’s called remix OS, and it’s based on Android-x86. Info here:
http://www.jide.com/en/remixos-for-pc
That’s a Windows error message, which suggests that the Grub bootloader wasn’t installed satisfactorily. I’ll do a bit of research and report back if I find anything.
Tried this on an old but good Samsung NC10. Everything went fine and android installed apparently satisfactorily. However, when I start android I get this error message – “BOOTMGR is missing”. re-starting with Control+Alt+delete produces the same message. Can you help please. I’ve already checked that the boot priority is correct.
hello evrebody
Question: what is MAX storage android-x86 can hold?
when I run installer, on some step he ask to put max storage space which is 2047 for apps and so
but I have 32 gb..
I cant find any information about that so I only can guest that 8 GB is max?
thanks for sugestions
Unfortunetly, it’ll be next to impossible as the RT BIOS is completely locked and SecureBoot can’t be disabled. It would take literally modifying the BIOS within Windows RT, which would mean jailbreaking the system, writing a new BIOS, and a method of flashing it within the RT/ARM environment
It’ll load the logo after reading something along the lines of “Android” or “Android x86” when booting. Sometimes it takes a fraction of a second, sometimes it takes a minute, it’s not really any different from other Linux distros
Android x86 works on any x86 processor, be it x86_32 (i386 aka 32bit) or x86_64(AMD64 aka 64bit). Android x86 will run better on Intel processors due to it being made for that hardware, but any x86 compatible AMD processor will run it
TL:DR- Yes, it will run any AMD CPU/APU made within the last 15 years
USB drive is brandnew, but I will try another one.. Thank you, I will have a look into that as well!
Hmm, perhaps try a different USB drive?
This might also help:
http://grokbase.com/t/gg/android-x86/136mkyxbbn/stuck-at-a-n-d-r-o-i-d-roor-x86
Thank you for the quick response! I have tried 3 different ISO files, from different sources.. Android 4.4, 5.0 and 5.1 but keep getting the exact same result.. I guess the laptop is not capable? Too bad, was hoping for a nice second life for this old laptop..
Hey, I’m not sure why that happened. It sounds like the boot process didn’t start properly. Maybe try a different ISO file?
Hope anyone can help me.. I have followed all the steps, and get to the blue screen where i can select “Run Android X86 without installation”. I press Enter, but then, only the upper left quarter of the screen goes white with the text “Detecting Android-x86…. found at /dev/sda1”.
Below there is a black line and it says “A N D R O I D root@x86:/ #”
Seems to be some sort of input command line. But i have no clue whatsoever what command to execute..
Have i downloaded the wrong ISO file?
Laptop is a Toshiba Satellite L100-L130 by the way.
I don’t think so, sorry.
Are you able to install onto a mac?
You could try creating a new blank FAT32 partition in Windows, then seeing if it’s properly detected by the disk utility upon install?
all drives ate NTFS.. what should d do if i want to install it in a new partition??
Well done! Glad you got it sorted.
Ok, so the answer was pretty straightforward. After some digging around I found the following to work:
To get Android-x86 working on a GPT disk with EFI bios, Use the EFI install file and use dd to get it onto Install Android-x86 from the boot-usb to an empty usb, preferably 8GB or bigger. Format the empty USB to ext2 (don’t know if ext3 would work) and install Android-x86 onto it. I chose to also install GRUB on it, but I’m not sure if it’s necessary.
Made a fresh partition, a few GB bigger than the usb with the android installation on it and formatted the partition to ext2.
Again used dd, from Ubuntu, to copy the usb contents to the fresh partition and after that edited the file /etc/grub.d/40_custom by adding the following lines at the end of the file, notice that , hd0,10′ refers to the partition where Android-x86 lives, in my case /dev/sda10. Internal harddisk is always called hd0 AFAIK:
menuentry “Android” {
set root=(hd0,10)
linux /android-4.4-r2/kernel quiet root=/dev/ram0 androidboot.hardware=android_x86 SRC=/android-4.4-r2 DATA= video=-16
initrd /android-4.4-r2/initrd.img
}
Android-x84 runs like a charm now :)
Clash of clans doesn’t work with me, Boom beach does!
if i boot the android system i can never go back to windows 8…..??
plz tell me how to go back normal windows operating system
The saga is over. With a nod to reverse engineering, I managed to access the Play Store through Play Books, and all is now well in the universe…