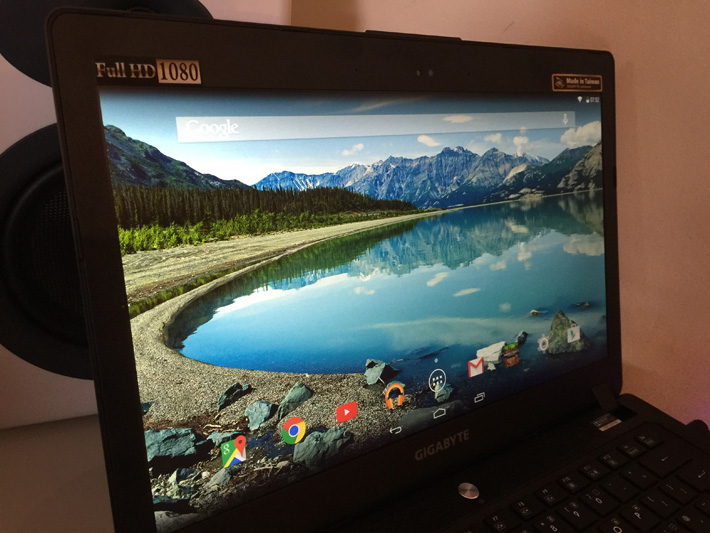
Android is pretty good for phones and tablets, but how does it work on a laptop? Surprisingly well, actually. If you’d like to try the free OS for yourself, you can take advantage of the Android-x86 project, a cooperative effort that brings Android support to desktops and laptops running x86 processors. You’ll get access to the same Android apps that you’ve installed or bought on your Android tablet or smartphone, and benefit from a slick OS that runs quickly on even dated devices. You likely won’t have a touchscreen to use, but Android still supports trackpads, keyboards and USB peripherals just fine. It seems like a fair trade, and if you’ve got an old laptop sitting around then it’s a fun experiment to try.
A few years ago I covered the install process for what was then the latest Android-x86 release, which was 4.0 Ice Cream Sandwich. Since then, Android-x86 has been updated to follow each major Android release, and now sits at version 4.4 KitKat. (An update to 5.0 is planned too.) With that in mind, I thought I’d revisit Android-x86 to see how far it’s come. Why don’t you join me? Here’s what you’ll need to do.
Part 1: Preparation
First, you’ll need to prepare your materials. You will need:
- The latest ‘live & installation’ ISO file from the Android-x86 site. I am using Android-x86-4.4-r2.iso.
- UNetbootin (downloadable here)
- A USB stick with 1GB or more of storage space (I used an 8GB stick)
- A working computer to prepare your USB stick (Windows, Mac & Linux are all fine)
- A computer with an Intel x86 or x64 processor (could be the same computer as in step 4).
Now we have to prepare our USB drive. Plug your drive into your computer, and format it to the FAT32 file system. You will lose all data on the drive, so be sure to back up anything of value before you perform this step!
Once the format has been completed, start UNetbootin.
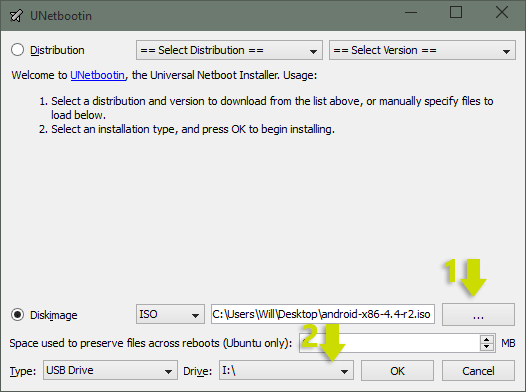
Click on the button with the ellipses near the bottom of the screen, and select the ISO file that you’ve downloaded. Then, select your USB drive from the dropdown menu at the bottom. Make sure your selection is accurate! When you’re ready press OK. Android-x86 will be copied to the USB drive, and the drive will be made bootable. When it’s complete, close UNetbootin and remove the USB drive from your computer.
Part 2: Boot from the USB drive
Now we need to boot into the USB drive from our target computer. Plug in the USB stick and turn on the computer (if it is already on, restart). In order to boot from the USB, you’ll need to make sure it is the first device that your computer attempts to boot from.
You can do this by pressing a key as the computer turns on. The key is different on different computers, but common keys include F1, F2, F10, F11, F12 and Delete. The hotkey will usually flash on the screen as the computer first boots, or can be Googled with the phrase “[name of motherboard / computer] BIOS key”.
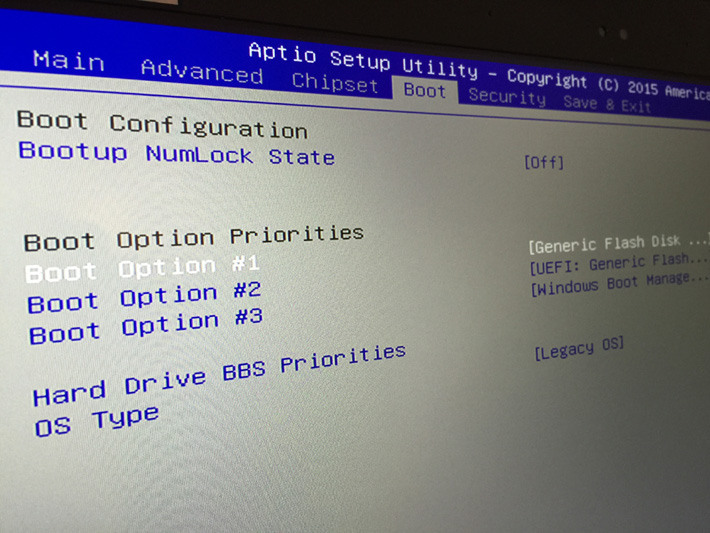
Enter the BIOS and change your boot order so that your USB drive comes first. You may also need to make some changes to ensure the drive is recognised on newer devices – for example, I had to change to a ‘legacy boot’ instead of ‘UEFI’ on my laptop. Make your changes, then press F10 to save them and reboot.
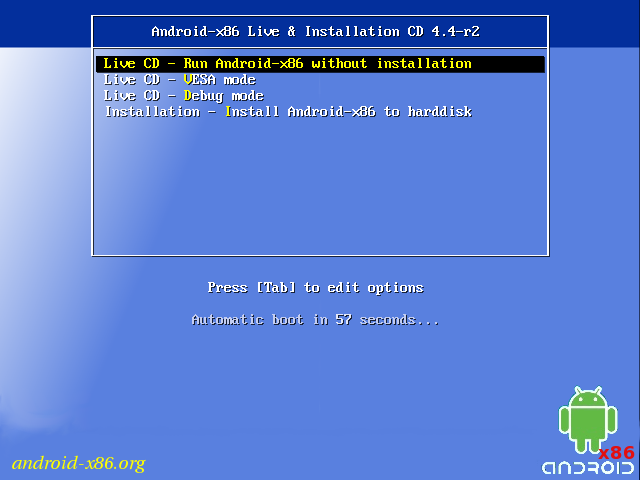
If all goes well, then you should see a screen like the one below. You will have several options here for installing Android-x86, but I recommend you choose ‘Live CD – run Android-x86 without installation’. This will let you try out the OS to see if it works well on your machine, without messing up your currently installed operating systems.
If you do decide to install, you’ll be asked to choose which drive you’d like to store Android-x86 on. Choose your drive, then choose the maximum size when asked how large you’d like to make the installation. This will provide more space for programs later on.
Whether or not you chose to install Android, after a few seconds / minutes you’ll be into Android proper!
Part 3: Android!
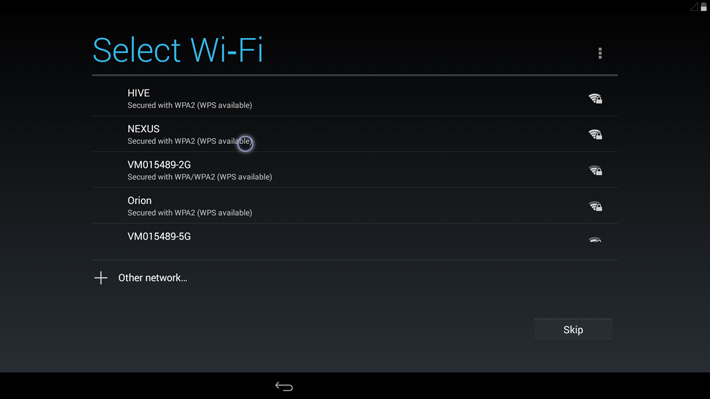
If all goes well, then you’ll see the Android logo, then a setup screen. As this is the first time you’re booting into Android-x86, you’ll need to go through the same setup process as on a real Android tablet. You’ll be asked to join a wireless network, sign into your Google account, and all the rest of it. With luck, your wireless card, keyboard and trackpad will all work during this stage. I had no issues here, so hopefully the same holds true for you.
Once setup is completed, you’re free to explore the OS! Android-x86 comes with the Google Play Store, so you can access this and download any apps that you like. Some apps won’t be available for install (or will crash immediately), so it’s worth testing out your favourites.
I installed Chrome, Google Music and a few games, including Minecraft Pocket Edition. Not all apps and games work well, but those that I tried seemed OK!
Questions? Comments?
I hope this guide worked for you. Let me know if it did in the comments below, and if you’re having problems I’ll try to help you if I can!
Would you rather install Android as a virtual machine? Click here.


In my system , I ran it and shows the message
” Detecting android -x86…. found at /dev/sbd1
A N D R O I D root@x86:/ #”
What should i do ? Pls help..
No, it should be possible to install remix OS outside of a virtual machine.
So then…the only way to experience to REMIX OS is using by Virtual Machine. Right.:)
You have to drag to scroll screen. But RemixOS and PhoenixOS do it right.
Try the 32-bit version, maybe?