The Google Experience Launcher (GEL) introduced with the Nexus 5 and KitKat is a big step up from previous stock launchers on Android. The big selling point is easy access to Google Now as the left-most screen, but the larger-than-normal icons and use of transparency work well too.
The only real downside to the new launcher is that there are few customisation options compared to third-party alternatives like Nova Launcher. Thankfully, you can add customisability through an Xposed module called GEL Settings. In this article, we’ll show you how to install the module and what changes you can make.
Installation Instructions
Xposed is a framework for rooted phones that supports a wide range of modifications, called modules. Once Xposed is installed (a process which requires root), you can add new modules and then restart your phone to enable them.
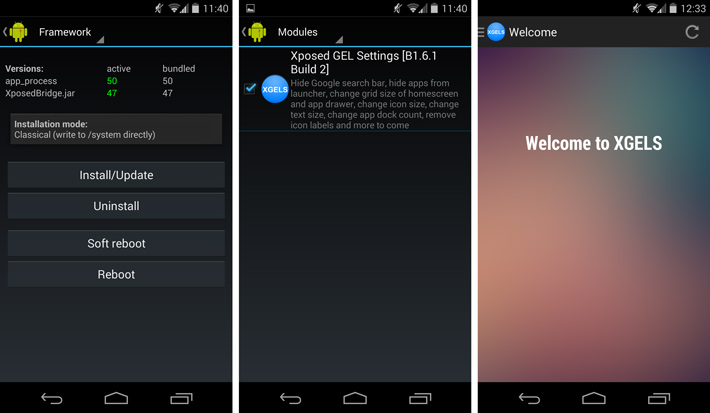
Use the download links below to get the Xposed and GEL Settings APK files on your phone. Once this is complete, run the Xposed installer. Follow the instructions to install the app, and remember to grant root permissions when you’re prompted. When installation is complete, reboot your phone. Once your phone is back up, you can run the GEL Settings installer. This app will add a listing for the GEL Settings module in the Xposed installer app; just tick the box and then reboot your phone once more.
If you need root, you’ll need to look for an appropriate guide. We wrote this root guide for the Nexus 5, and you can follow it for all recent Nexus devices too.
Using GEL Settings
Once you’ve installed, activated in Xposed and rebooted, you can begin making changes to the GEL launcher. Run the Xposed GEL Settings app in the app tray to get to the Welcome screen. From here, swipe from the left side to see the menu and access the following options:
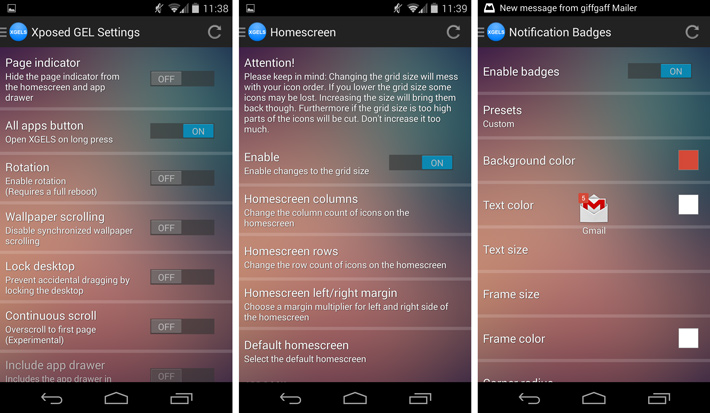
General: This section includes many helpful fixes. We recommend the ‘All apps button’ to begin with, as this allows you to easily access GEL Settings by long pressing on the all apps button. Two other useful options to try are ‘Rotation’, which allows the launcher to rotate into landscape mode; and ‘Resize widgets’, which forces all widgets to be resizeable.
Google Search Bar: A simple section, that allows you to hide the search bar from each home screen. If hidden, you can also automatically show the bar on the Google Now left-most page.
Homescreen: A more advanced section that allows you to have more icons on screen, hide or extend the dock, and hide or modify the appearance of icon labels and folders. We like boosting the number of icons from a 4×4 grid to a 5×5 grid, then hiding icon labels to save a little space.
App Drawer: A relatively short section that allows you to have more apps per page, as well as some helpful settings like ‘Remember position’.
Gestures: These are a little buggy, but can be helpful. You can set gestures to launch things or change settings by swiping in various directions.
Notification Badges: Add iOS-style notification badges to app icons. Only works with some apps, but the appearance of the badges can be customised.
System UI Tweaks: These advanced settings require a full reboot to enable; don’t forget it! We recommend the two intelligent button settings (‘Home button’ and ‘Back button’), which change what your soft buttons do when you are back on your default home screen. The home button then opens the app drawer, while the back button puts the display to sleep.
Backup/Restore, Settings, Premium/Support: These sections offer few practical options, but do allow you to support the developer by picking up a premium membership – unlocking additional functionality across the Settings app.
Signing off
With that, we come to the end of our look at the Xposed GEL Settings app. We hope you’ve found it useful, and that you’ll let us know what you think in the comments below. You can also check out more fun and useful Xposed modules at their official site.


