Today we’re going to show you how to maximise the use of your device, by unlocking the bootloader, then rooting and installing custom recovery software. By using the Nexus Root Toolkit, we’ll be able to do this with the minimum of fuss and without requiring a great deal of technical knowledge.
Before we begin, here’s the standard warning: THERE IS A SMALL RISK OF DATA LOSS, BRICKING YOUR DEVICE, ETC. If you proceed carefully and follow instructions then you should be just fine, but I cannot be held responsible for the results of following these instructions. Having said that, I’ve never known anything unrecoverable to happen and I’ve followed these steps without issue.
0. Install and Run the Nexus Root Toolkit
While it’s possible to do everything in this guide using ADB commands, there’s a slightly more friendly way of doing it – using the Nexus Root Toolkit, a well-designed app that automates pretty much everything. To get started, download the latest version of the application from WugFresh.com. Install the application, then launch it.
To begin, you’ll need to go through the initial setup phase. This is pretty straightforward – select Nexus 5 as your device, then the build number that matches your device (likely KRT16M).
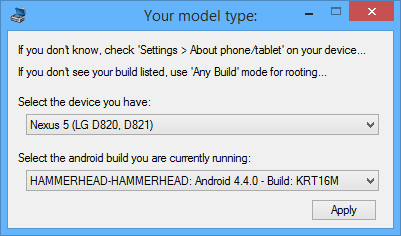
You will be offered the chance to download a few files for the Nexus 5; be sure to accept these. Once this is completed, you should be at the Nexus Root Toolkit (hereforth known as NRT) main screen, with options to Install Drivers, Backup, Restore, Unlock, Root and Install Custom Recovery.
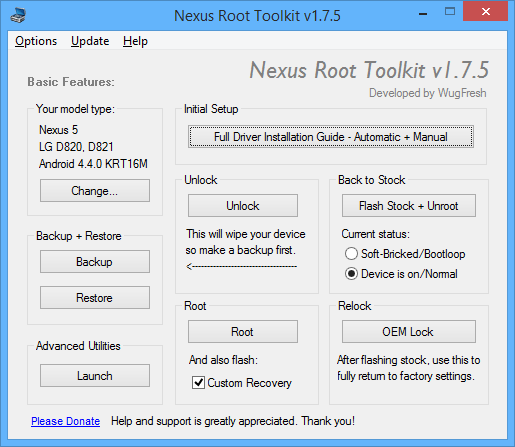
the main screen for the Nexus Root Toolkit
1. Install Drivers
Now that NRT is installed, you’ll need to ensure drivers are installed for your device.
Start by enabling USB debugging on your phone. You’ll need to unlock the Developer settings menu by going into Settings -> About phone and then pressing on the build number at the bottom of the screen seven times. You’ll see a message that “You are now a developer!” when you’ve succeeded. Then, go into Developer options in Settings, and turn on USB debugging.
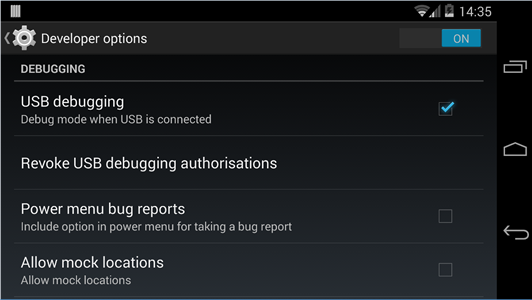
The relevant entry in Developer Options
When you connect your phone to a PC during the rest of this step, you’ll be asked to confirm that you want to allow USB debugging for this computer – be sure to select allow and to tick the box to remember this choice.
Now, follow the instructions provided in the NRT program to install drivers (“Full Driver Installation Guide…”). Typically, this involves deleting all existing drivers, then installing the universal drivers provided. Remember to not skip any steps (including removing old drivers and restarting your computer), as they are all necessary. Once you get a success message in the driver test phase, you’re ready to move onto the next steps.
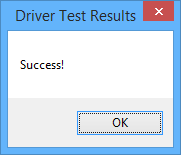
If this doesn’t work, try different driver installation packages and/or ask for help on the XDA developers forums.
2. Backup
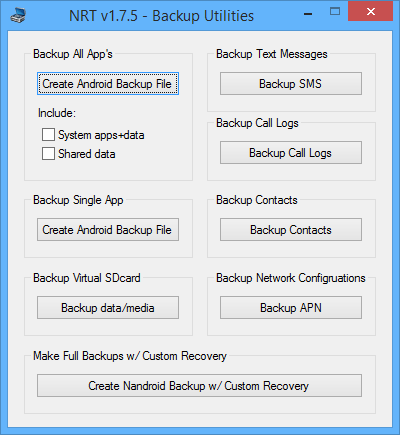
Unlocking your phone will wipe your data, so make sure you back up everything first. Click on ‘Backup’ in the main Nexus Root Toolkit window, then follow the instructions. Your device will reboot, then you’ll be asked to unlock your device and prepare to accept the backup option. Just wait and then press ‘Back up my data’ when you’re given the opportunity. Then, wait for a few minutes while your apps and data are backed up and copied to your computer. My backup file was about 900 MB, and took about 10 minutes to complete.
3. Unlock Bootloader
Unlocking the bootloader will let you rewrite the protected section of your Nexus smartphone, allowing custom recoveries and ROMs to be installed. As mentioned earlier, this will wipe your device memory completely so make sure you do a backup first!
Allow the NRT to reboot your device into bootloader mode automatically, then you’ll be asked to confirm you want to unlock the bootloader. Use the volume buttons to select the ‘yes’ option, then press the power button to confirm your choice.
Your phone will reboot a few times and display some interesting screens, before ending up back at the initial setup screen. Go through this as you did initially, filling in your Google account details and the like. Once concluded, be sure to enable the Develop Menu and then USB debugging as you did in the first step.
4. Root and install custom recovery
Rooting will allow you to run root-only apps (which tend to offer unique capabilities versus root-free apps). Meanwhile, installing a custom recovery software will make it easier in the future to install custom ROMs, make Nandroid backups and other useful system functions. Together, you’ll have access to the full gamut of apps, hacks and modifications available for your device.
Thankfully, this stage is quite straightforward. In the Root section of the NRT’s main window, click the checkbox next to “and also flash… Custom Recovery”, then press the Root button.
As usual, read each window carefully and follow the instructions provided. I had to manually boot into Bootloader mode (power off, then hold volume down and press the power button) in order to get moving, but this might not be necessary.
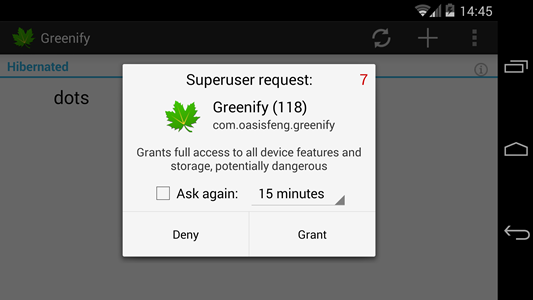
Once your device is rooted and your TWRP custom recovery is installed, you’re done! You may need to update the SuperSU binary to finish things off, but after that it’s all gravy.
5. Restore
Now that you’ve achieved unlocking, root and custom recovery installation, you’re ready to restore your phone to the way it was before. Use the ‘Restore’ option in NRT, selecting the .ab file you made earlier.
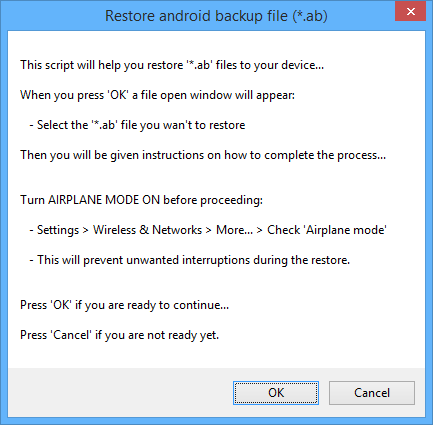
Your device will reboot, then you’ll be asked to “Hold the device in your hand and unlock the screen” by NRT. Do as it suggests, then hit ‘OK’. Click “Restore my data” when given the option on your Nexus 5, then wait patiently while the restoration is carried out. As before, it can be a good idea to enable Airplane mode so that this process isn’t interrupted by an incoming call or app updates.
When completed, you’ll get a “Process finished!” message from NRT.
6. Success!
After restoration is complete, you should be done! I hope that everything went smoothly and you’re happy with the results. Now you can try out some root-only apps and new ROMs, or just rest easy knowing that you can do either if you want.
Now that you’re good to go, make sure your phone is safe with a Nexus 5 case!
my phone is rooted (nexus 5) but i am having troubles with clash of clans and i gues it has something to do with luckypatcher now i whant to re-root my phone is this possible and the right sulution (tryed things like , reboot, re-patch, re-download(clash of clans),re instal playstore ,
please help me…….
Nope, bootloader unlocking and carrier unlocking aren’t related.
just a question…if my nexus 5 is locked in by carrier (vodafone.ro in my case) by unlocking the bootloader will i be able to use my nexus with any carrier?
Nope, you can change to ClockworkMod in the NRT options :)
TWRP is the only choice?