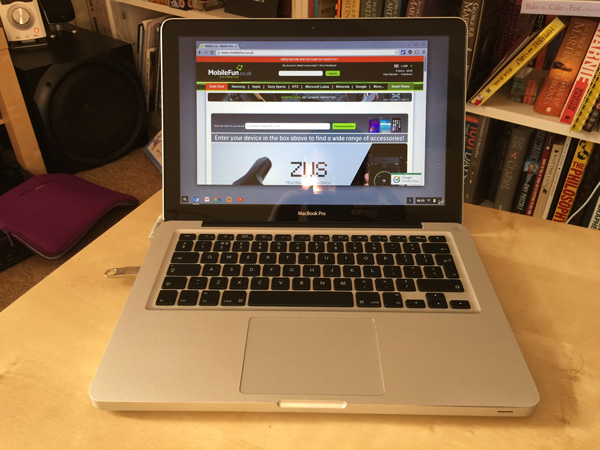
 Chromebooks are brilliant: they’re inexpensive laptops that don’t feel cheap, thanks to good performance and a slick online-focused Chrome OS. Buying a Chromebook isn’t the only way to get one, either — you can also install Chrome OS on your own old Mac or Windows laptop, thanks to a new project called CloudReady. You can choose to replace your existing, or set up a dual-boot system.
Here’s how to do it!
Step 1: Download CloudReady from Neverware
NYC startup Neverware has created a version of Chrome OS (or to be specific, Chromium OS) ideally suited to running on older laptops, and they’re offering it free to individual users. So the first step is to head over to their site, and download the cloudready zip file onto your PC.
Step 2: Install the Chrome Recovery Utility in Chrome
Now we need to prepare a USB drive to install Chromium on our old laptop. This is actually done through a Chrome browser extension called Chrome Recovery Utility. Open Chrome, then install the extension from the Chrome Extensions store.
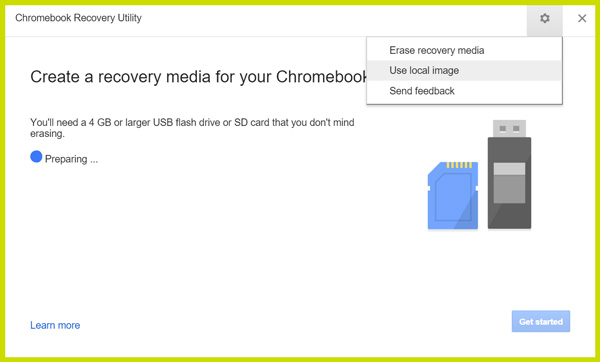
Step 3: Set up your Chromium USB drive
Launch the Chromebook Recovery Utility (it’s the icon labelled Recovery in the Chrome apps launcher) to get started. Then, click the gear icon in the upper right corner, and select Use local image.
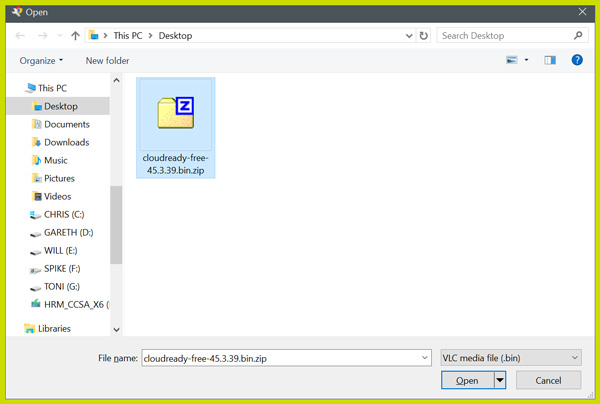
Next, select the cloudready.zip file that you downloaded and hit Open.
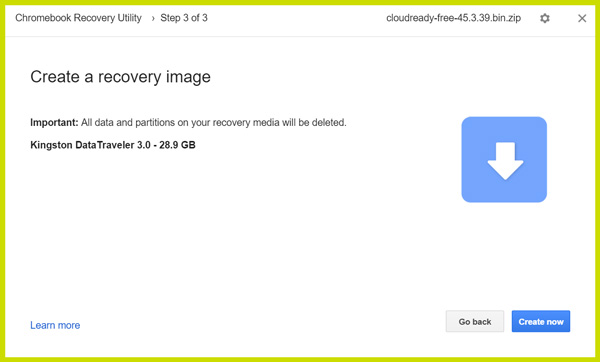
Insert your USB drive, select it from the dropdown menu, then hit Continue.

Affirm that the details are correct, remember that the drive will be erased, and hit Create now.
After the process has finished, your USB drive will be ready. Now we need to take out our USB drive from the PC it was created, and plug it into the computer we’re going to run Chrome OS on.
Step 4: Boot from your USB drive
Once you’ve plugged it in, start up the PC and access the boot menu by pressing a hotkey like F9 or F12. On a Mac, hold Alt / Option. Other PCs will have different hotkeys; try hammering Escape, F1 to F12 or Enter immediately after the computer is powered on, or Google for the name of your laptop and “boot key”.
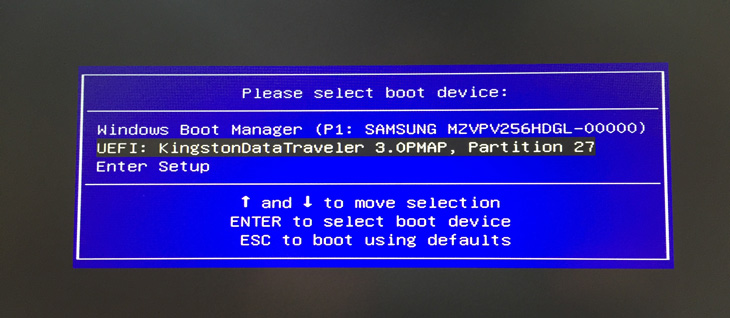
Some computers don’t have a boot menu, so you’ll need to access the BIOS and change the boot order so that that USB drive is listed at the top. Common BIOS keys are Delete, F1 and F2.
Once you see the CloudReady logo on your screen, you’ve succeeded!
Step 5: Sign into CloudReady
If all goes well, the boot screen will soon be replaced with a screen asking for your network credentials and keyboard layout. Put them in, then sign into your Google account. You’ll soon boot into CloudReady proper; to start with you’ll just have a grey background, a single Chromium logo in the dock at the bottom, and the time / date in the lower right.
Try using Chromium for a while, and make sure everything works as you like. If you’re happy with the interface and its performance, then you can go ahead and install the OS onto your PC.
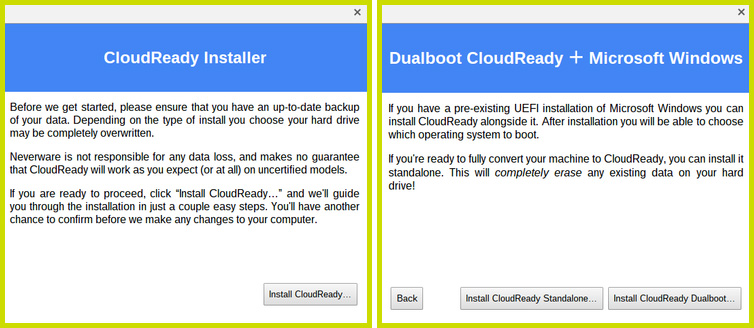
Step 6: Install CloudReady
To do this, click on the date in the lower right to bring up the menu, then click Install CloudReady. Read the notice, click Install CloudReady again, then choose whether you want to replace everything on your PC (Standalone) or keep your existing Windows installation alongside CloudReady (Dualboot). Not all systems support dual-boot, but it’s worth a try if you foresee needing to use Windows in the future. Installation will take up to 30 minutes, depending on the speed of your computer and drive. Once it’s complete, remove the USB from your PC, and reboot — you’re done!
Signing off
Need additional installation help? You can check out Neverware’s detailed instructions here, or write a comment below. We’ll try to help out if we can!
Thanks for reading the article and be sure to let us know what you think. I’m pretty happy with my new faux-Chromebook, and I hope you are too!