 Obvious disclaimer: Mobile Fun take no responsibility for any damage that may come from following the directions or indeed rooting your phone at all. This will void your phone’s warranty, so be careful. Having said that, I’ve had no issues whilst following these directions, so at least theoretically this should work as intended.
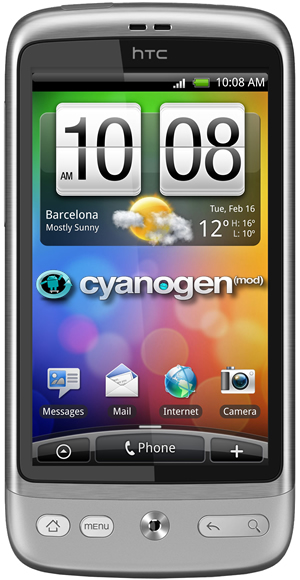
If you’ve got an HTC Desire, you might feel a bit behind the times. It was a great phone when it launched, but nowadays there are faster and shinier phones, sporting custom interfaces and with vastly more internal memory. Indeed, the lack of internal memory for installing apps is probably the biggest flaw of the otherwise excellent Desire, and makes trying out new apps a very tiresome business, as you have to free up some space before you can install something.
A great way to free yourself of that tiresome burden, as well as try out some cool alternative flavours of Android, is to root your Desire. Rooting refers to a process whereby you gain administrator access (or root, in Unix parlance) to the phone, allowing you to exercise a greater level of control over the phone’s software.
While rooting can be both simple and effective, it can also go wrong, at worst leading to the complete death of your phone. While this isn’t a common ocurrence, it’s worth following the directions carefully and reading that disclaimer at the top of the page before you begin.
Step 1: Preparing for Root
Before you actually install any software, it’s worthwhile to make sure that everything will proceed smoothly and give you the best possible chance of getting your phone back to the way it was, should anything bad occur.
1. Make a backup of all of the data on your phone and SD card. Connect the phone to your computer, and copy across all of the contents of each to your hard drive.
2. There’s an Android application called LifeSaver 2, which makes a backup of your phone calls and text messages to your SD card; do this before you back up your SD card if you’re worried about losing these.
3. Your contacts should be saved via Google’s synchronisation service, but note down your essential numbers just in case.
4. Go through your phone and note down each of the applications that you want to re-install on your new phone. There’s nothing worse than having to re-locate that essential application with the silly name, so spend some time on this, remembering to include widgets and system software in addition to your other commonly used apps.
5. You also need to prepare the PC you’re going to use to root the phone: uninstall HTC Sync if it’s installed.
6. Ensure there’s active service on your phone and you have at least 30 MB free on your SD card.
1. Download the HTC Hboot drivers for your PC. Follow the directions on the page to install the drivers.
Step 2: Running the Tools
2. Download Unrevoked 3. Just grab the latest version for Windows, then run the .exe file once it’s finished downloading. It should say “waiting for device.”
3. Make sure USB debugging is on (Settings->Applications->Development). Plug in your phone via USB.
4. The phone should be automatically detected, and the procedure will start. Follow the prompts to continue. Once you’re done, the phone will be rooted and the custom recovery image will be installed.
Step 3: Installing A Custom Rom
1. Download Rom Manager from the Android Store.
2. Choose ‘Download ROM’. Pick what you like (I’d suggest Cyanogen, including the optional extras).
3. You’re asked if you’d like to back up your stock rom and wipe your data. Accept all of these.
4. The ROM will be downloaded, and once it’s done your phone will reboot and automatically back up your phone, wipe the data, and then install the new ROM. Just follow the on-screen prompts.

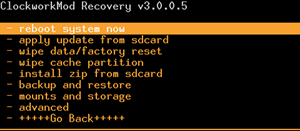
5. Sometimes, you can end up in the Clockwork Mod Recovery menu and without the automatic back up, wipe and reinstall. If this does occur, don’t panic: you can do the same steps manually.
To control the menus, use the volume buttons on the side of the phone and press the circular button to make a selection. Then follow these steps:
a. Back up your current ROM to your SD card (go to the ‘backup and restore’ menu, then select ‘backup’).
b. Next, wipe the data (‘wipe data/factory reset’ and ‘wipe cache partition’) from the phone.
c. Finally, install the new ROM from the SD card (‘apply update from sdcard’ then ‘choose zip from sdcard’). Choose the ROM .zip file (e.g. Cyanogen). Once it’s installed, install any extras (e.g. google apps).
d. When you’re done, select the top option: ‘reboot system now’.
6. With luck, your phone will restart with the new software and you’ll get to set it all up again. Enjoy your new ROM!
Conclusion
If you do follow these instructions and keep your Desire running longer, then you may find the only thing not new and shiny is your battery life, so try picking up an HTC Desire battery to keep things running longer.
I hope this worked for you! Let me know how it goes in the comments, but please read the disclaimer before you start!