Fitting a Whitestone Dome Glass Screen Protector may feel like a daunting task at first, especially when you see all of the pieces of kit you’ll need to use in order to do so. However from our own personal experiences, we can safely say that the process is relatively straight forward and can be completed correctly by anyone, no matter your experience level with fitting screen protectors.
In this guide, we’ll take you through the installation process step by step, explaining in great detail what to do and what to expect at every stage of the application. However if you would prefer to view this guide in video form, then please feel free to watch the video above.
Both the video and the guide below will show you how to install this protector on a Galaxy S8 Plus, however if you do have a different phone then fear not, as the installation process is exactly the same, even if you have an older model or even an iPhone.
1. Get everything out of the box and organised
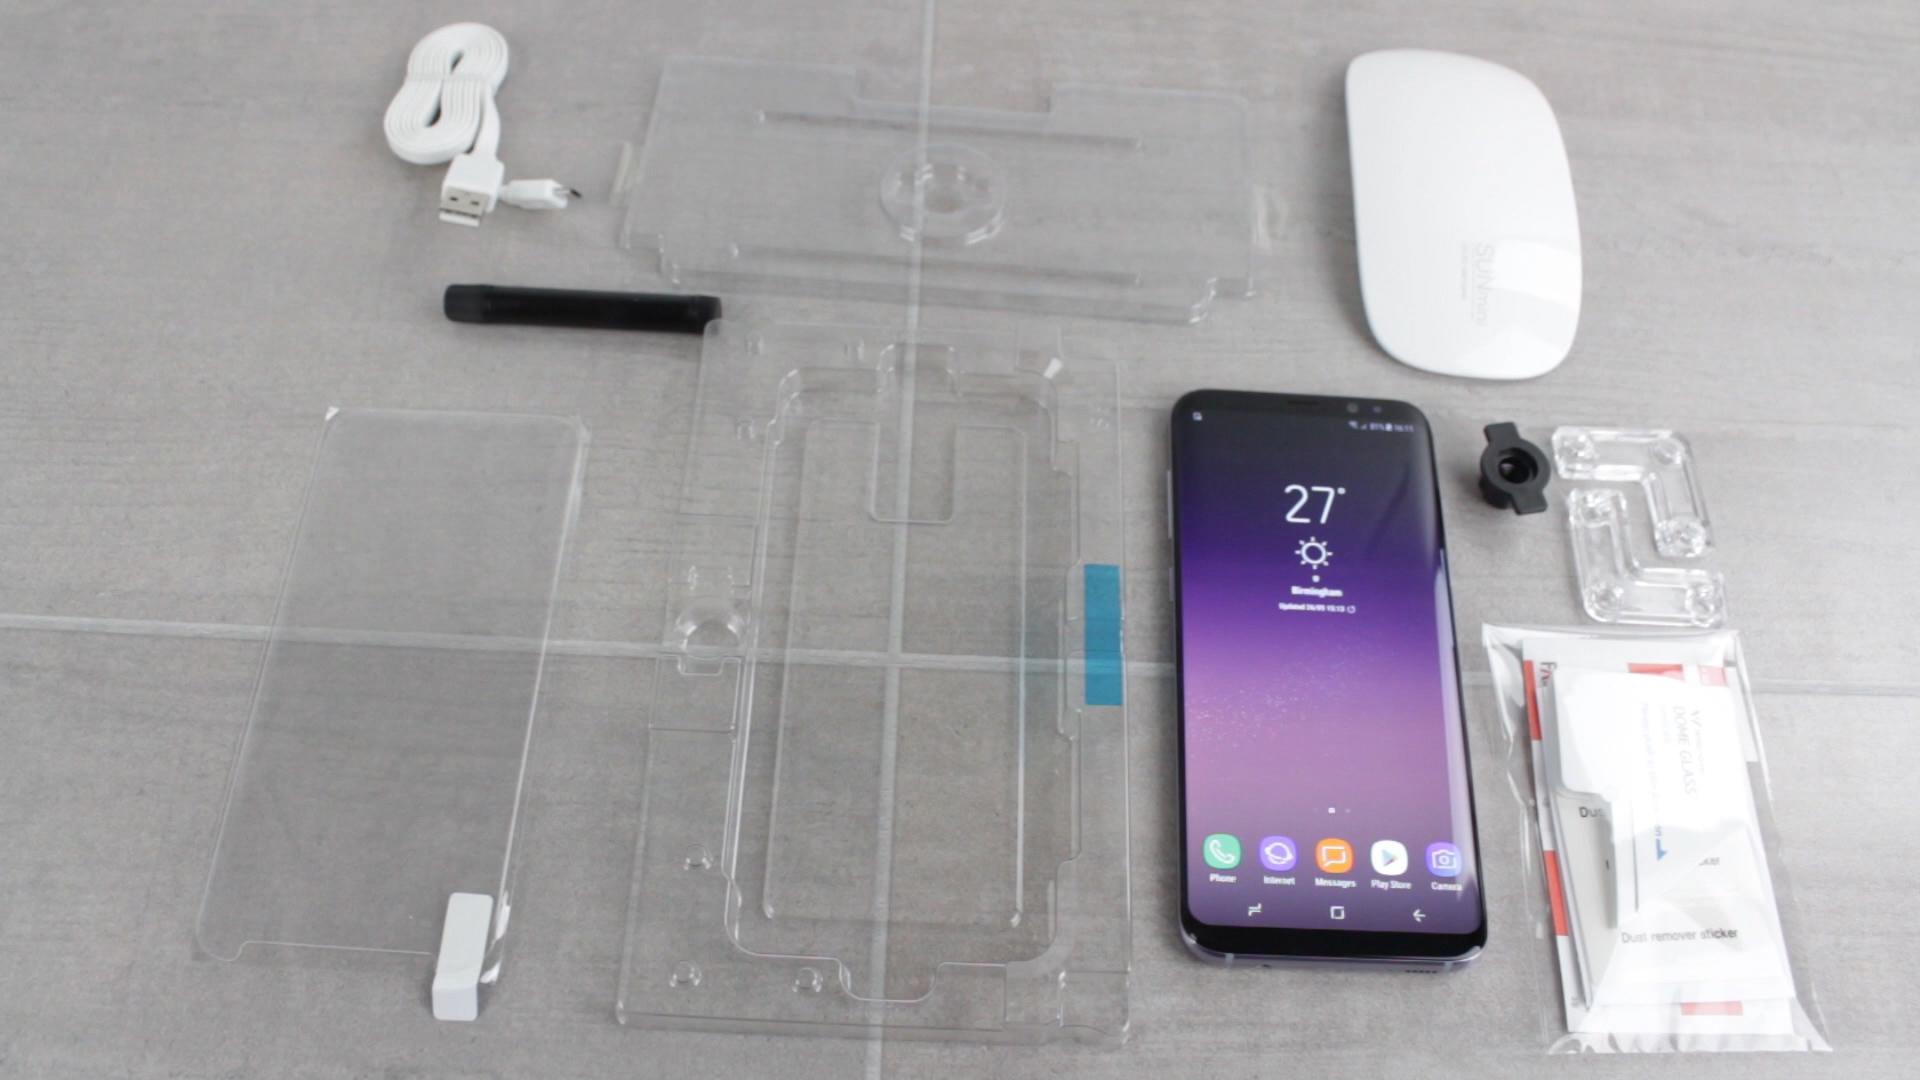
This may sound like a really obvious instruction, but there’s a lot of kit that comes with a Whitestone Dome Glass Screen Protector, so having it all laid out and ready to go will help you install the protector in the most efficient way possible.
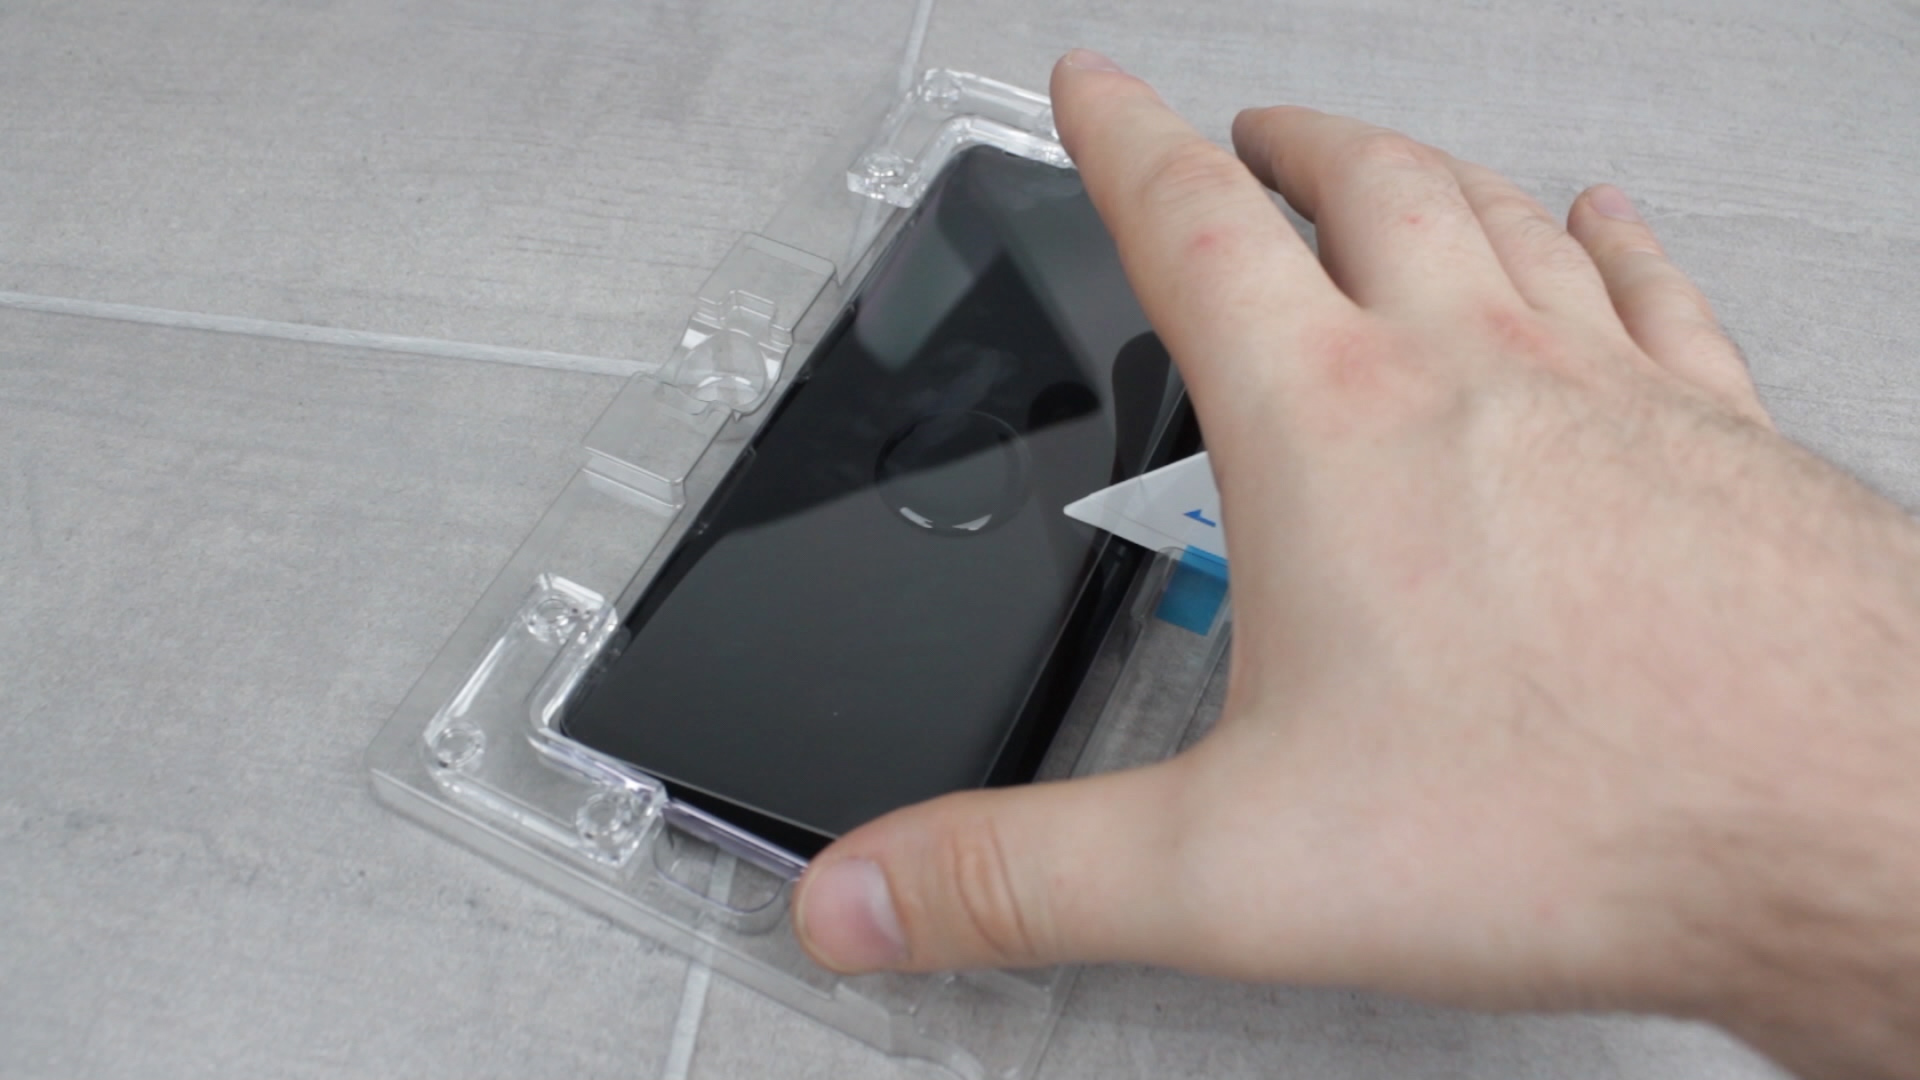
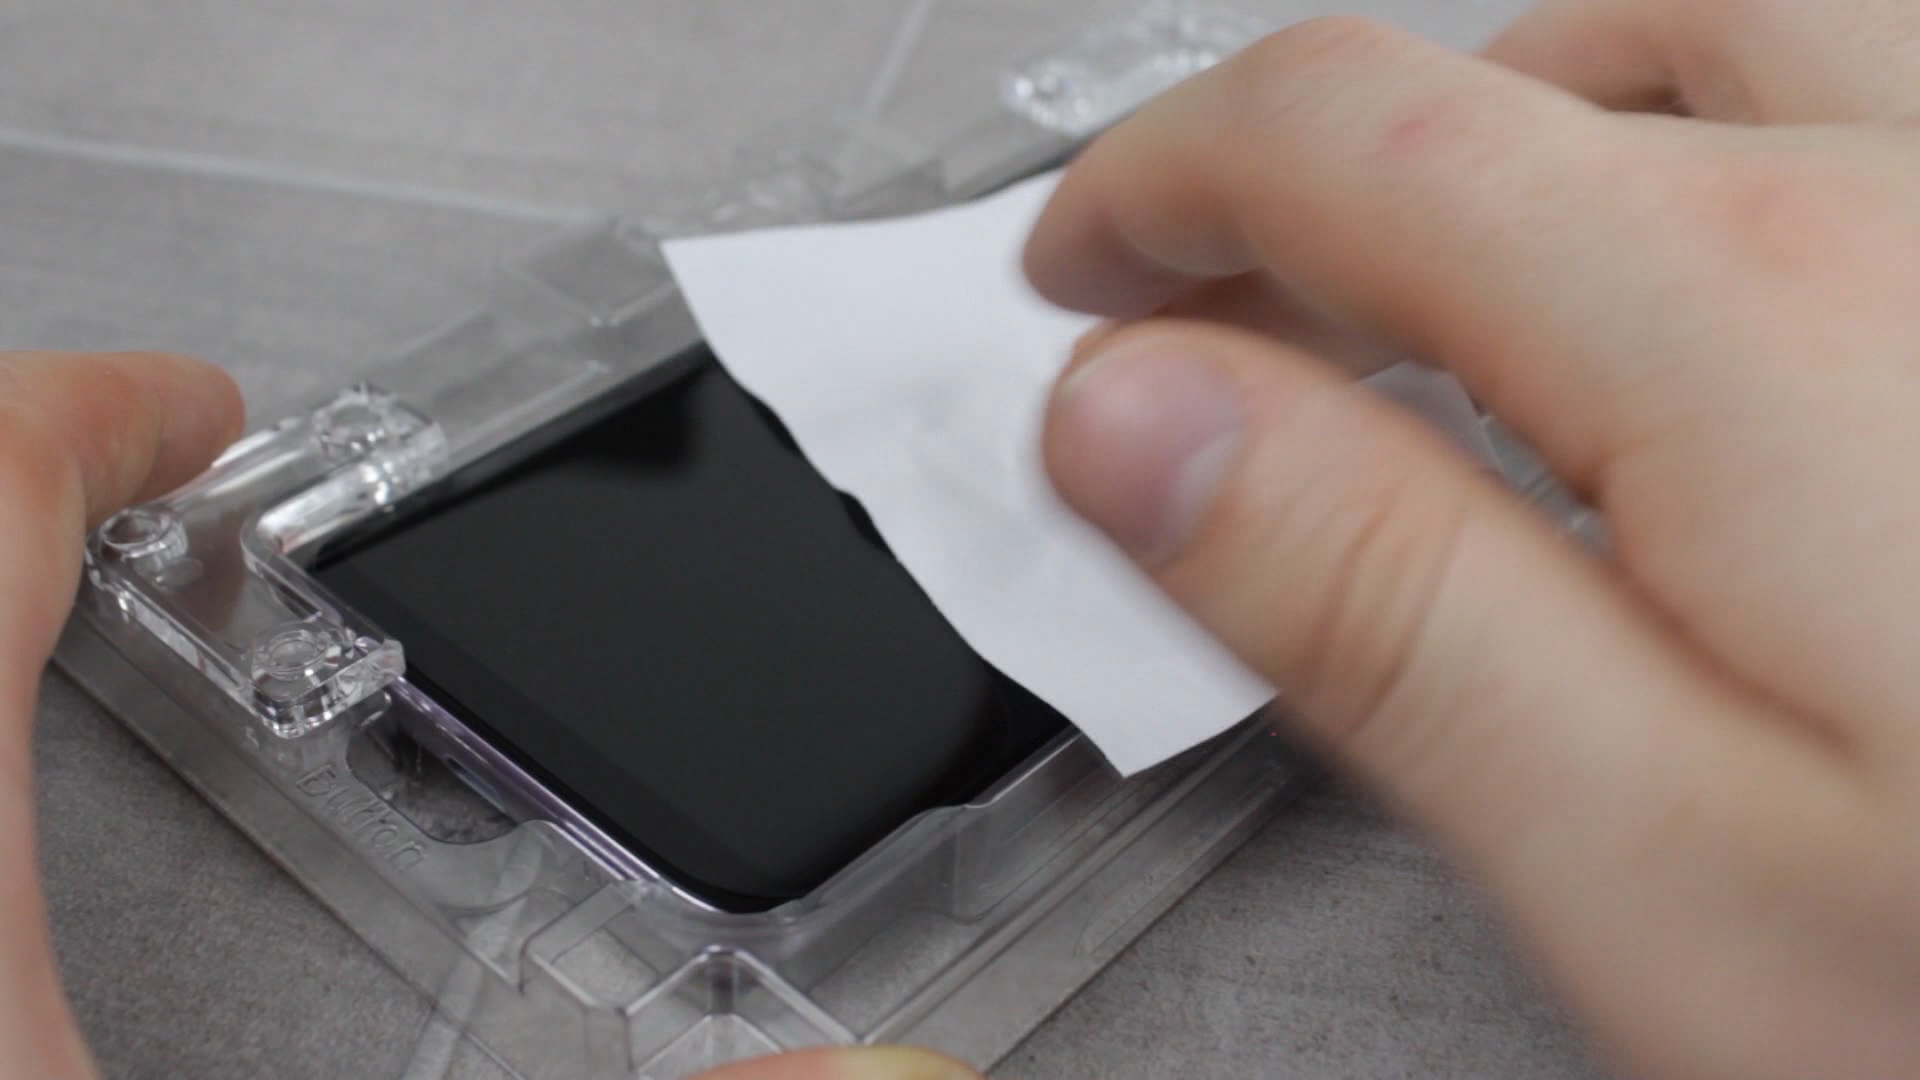
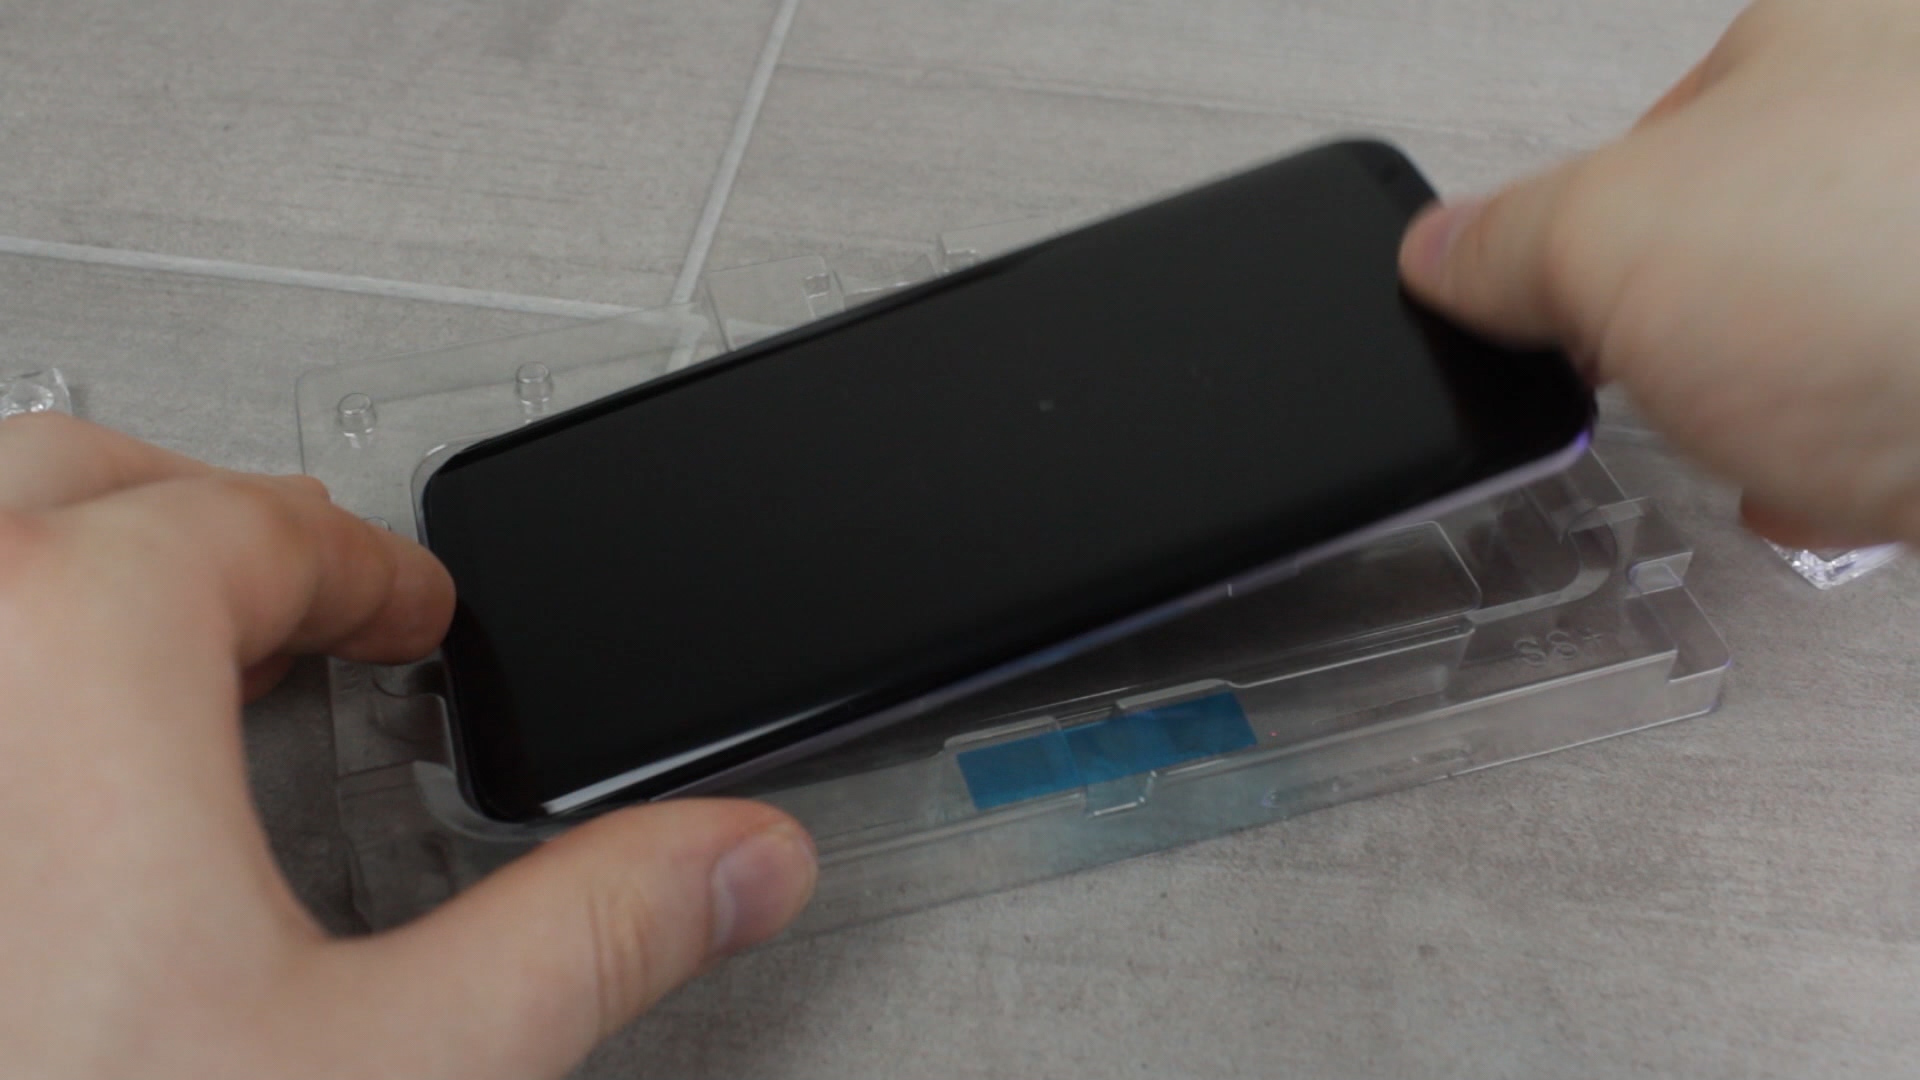
2. Place your phone inside the plastic tray and clean thoroughly
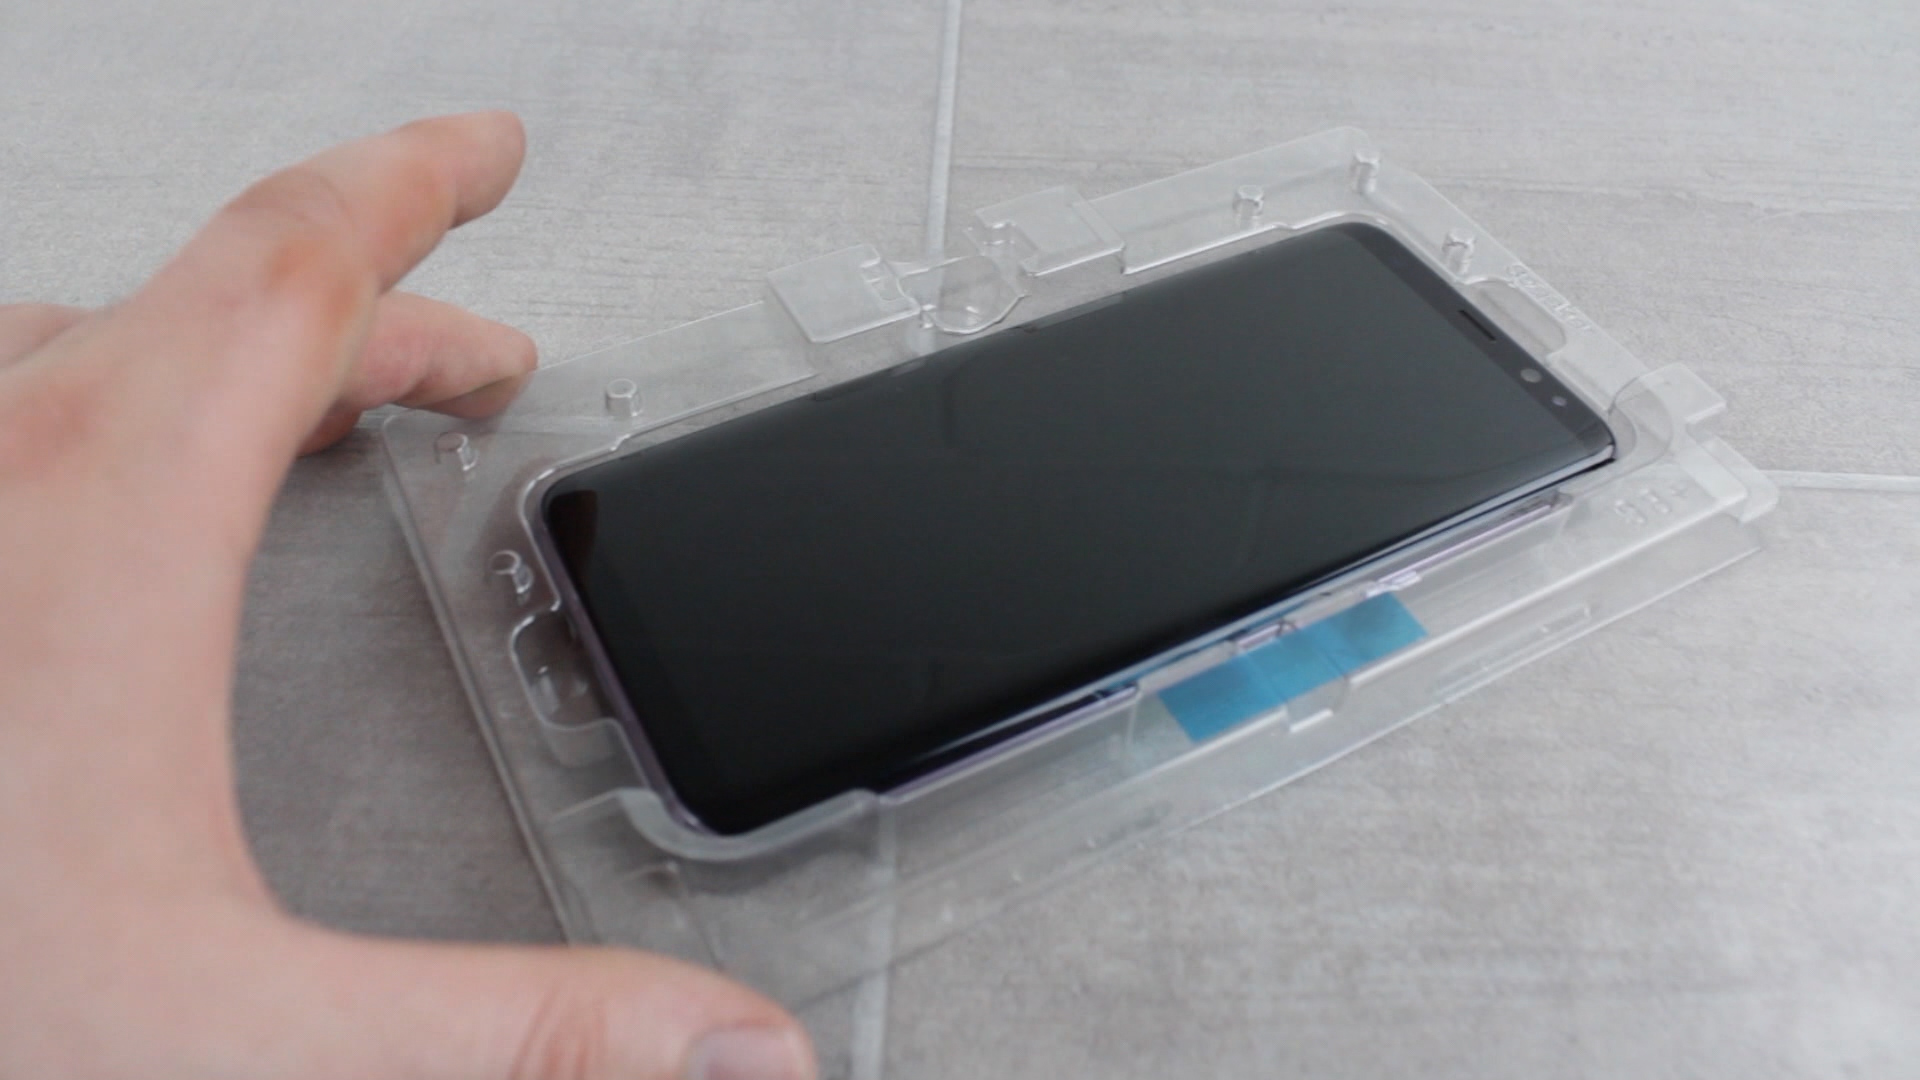
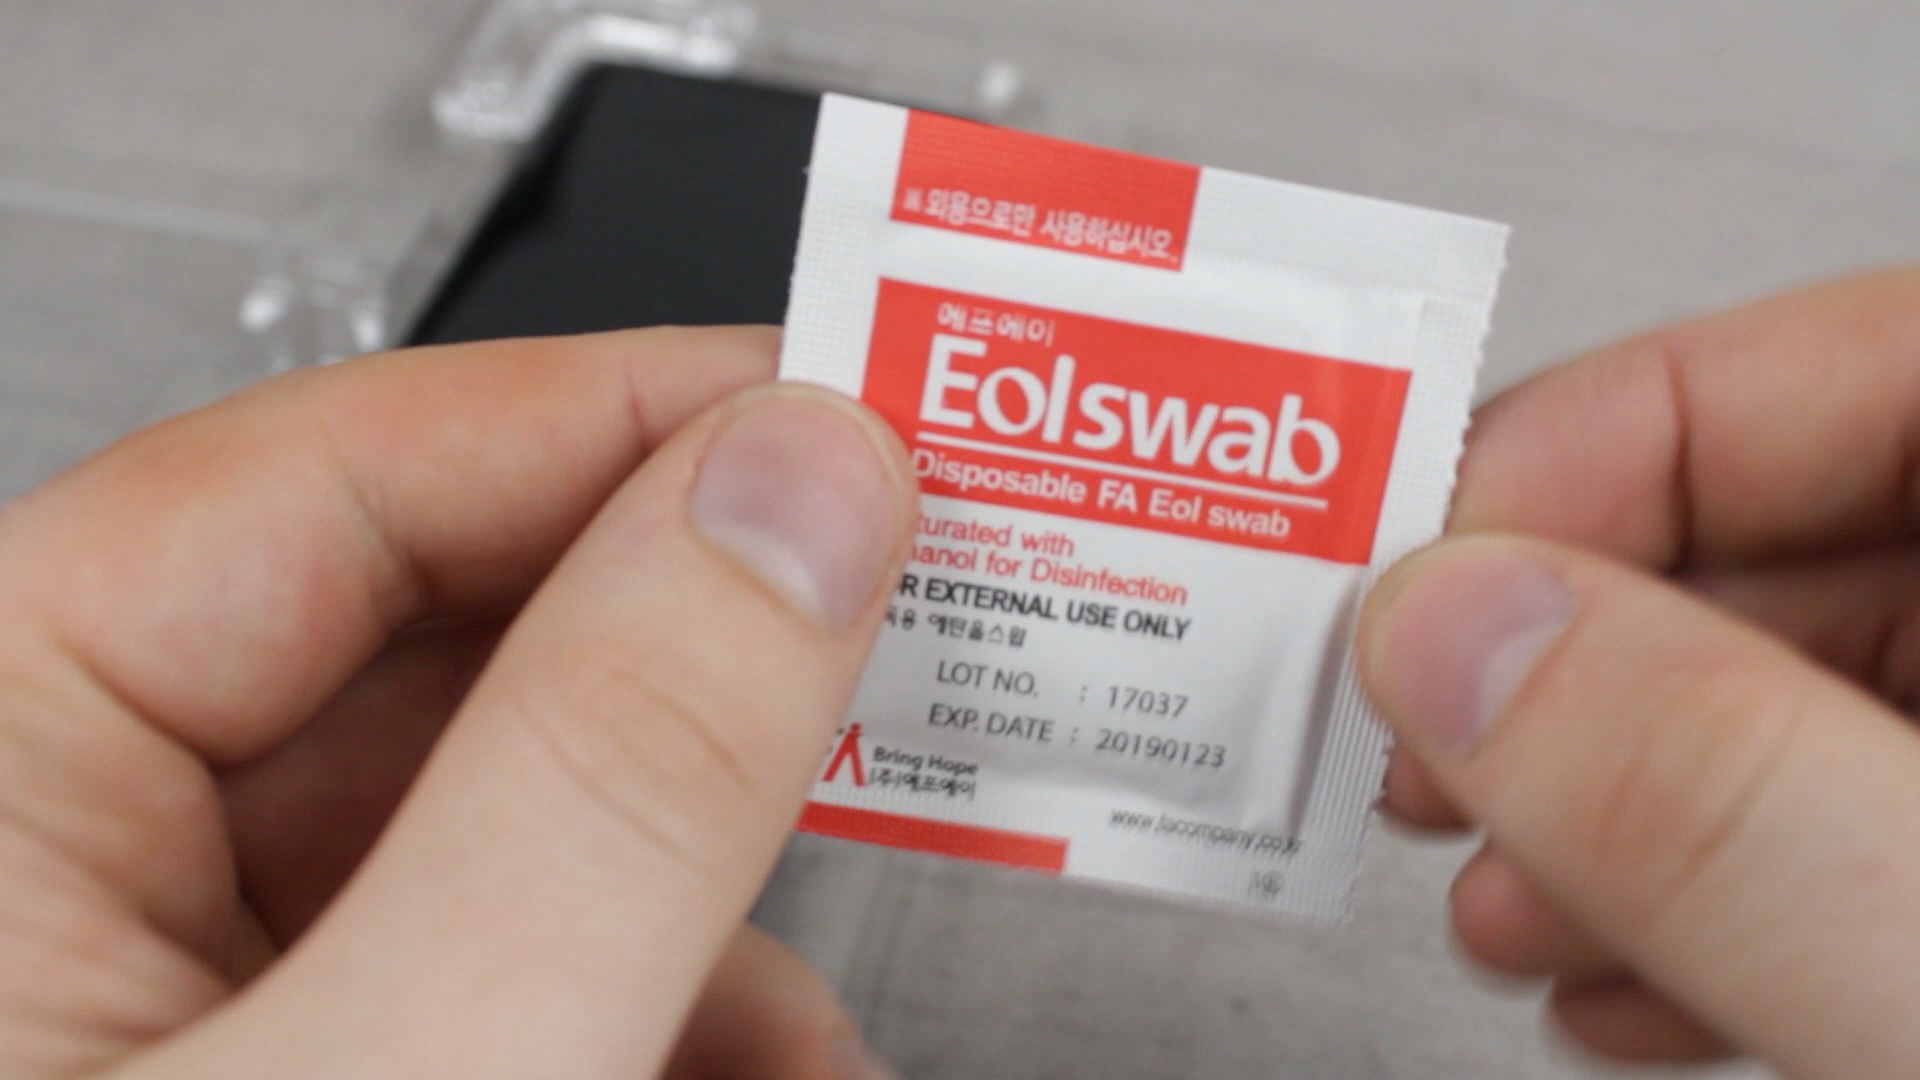
Once you’ve placed your phone into the guide tray, you’ll then need to take one of the three provided alcohol wipes and begin cleaning your display. Make sure to pay close attention to the sides, especially if your device features a curved display, as this will ensure a correct fit once finished. After this step you’ll now want to take the microfibre cloth that came with the protector and provide a further clean to your phone’s screen. Now you’ll be ready to use the dust-removal stickers to remove any final trapped specs of dirt and dust, leaving your screen in a perfect state for application.

3. Place the top section of the plastic tray over the plastic housing
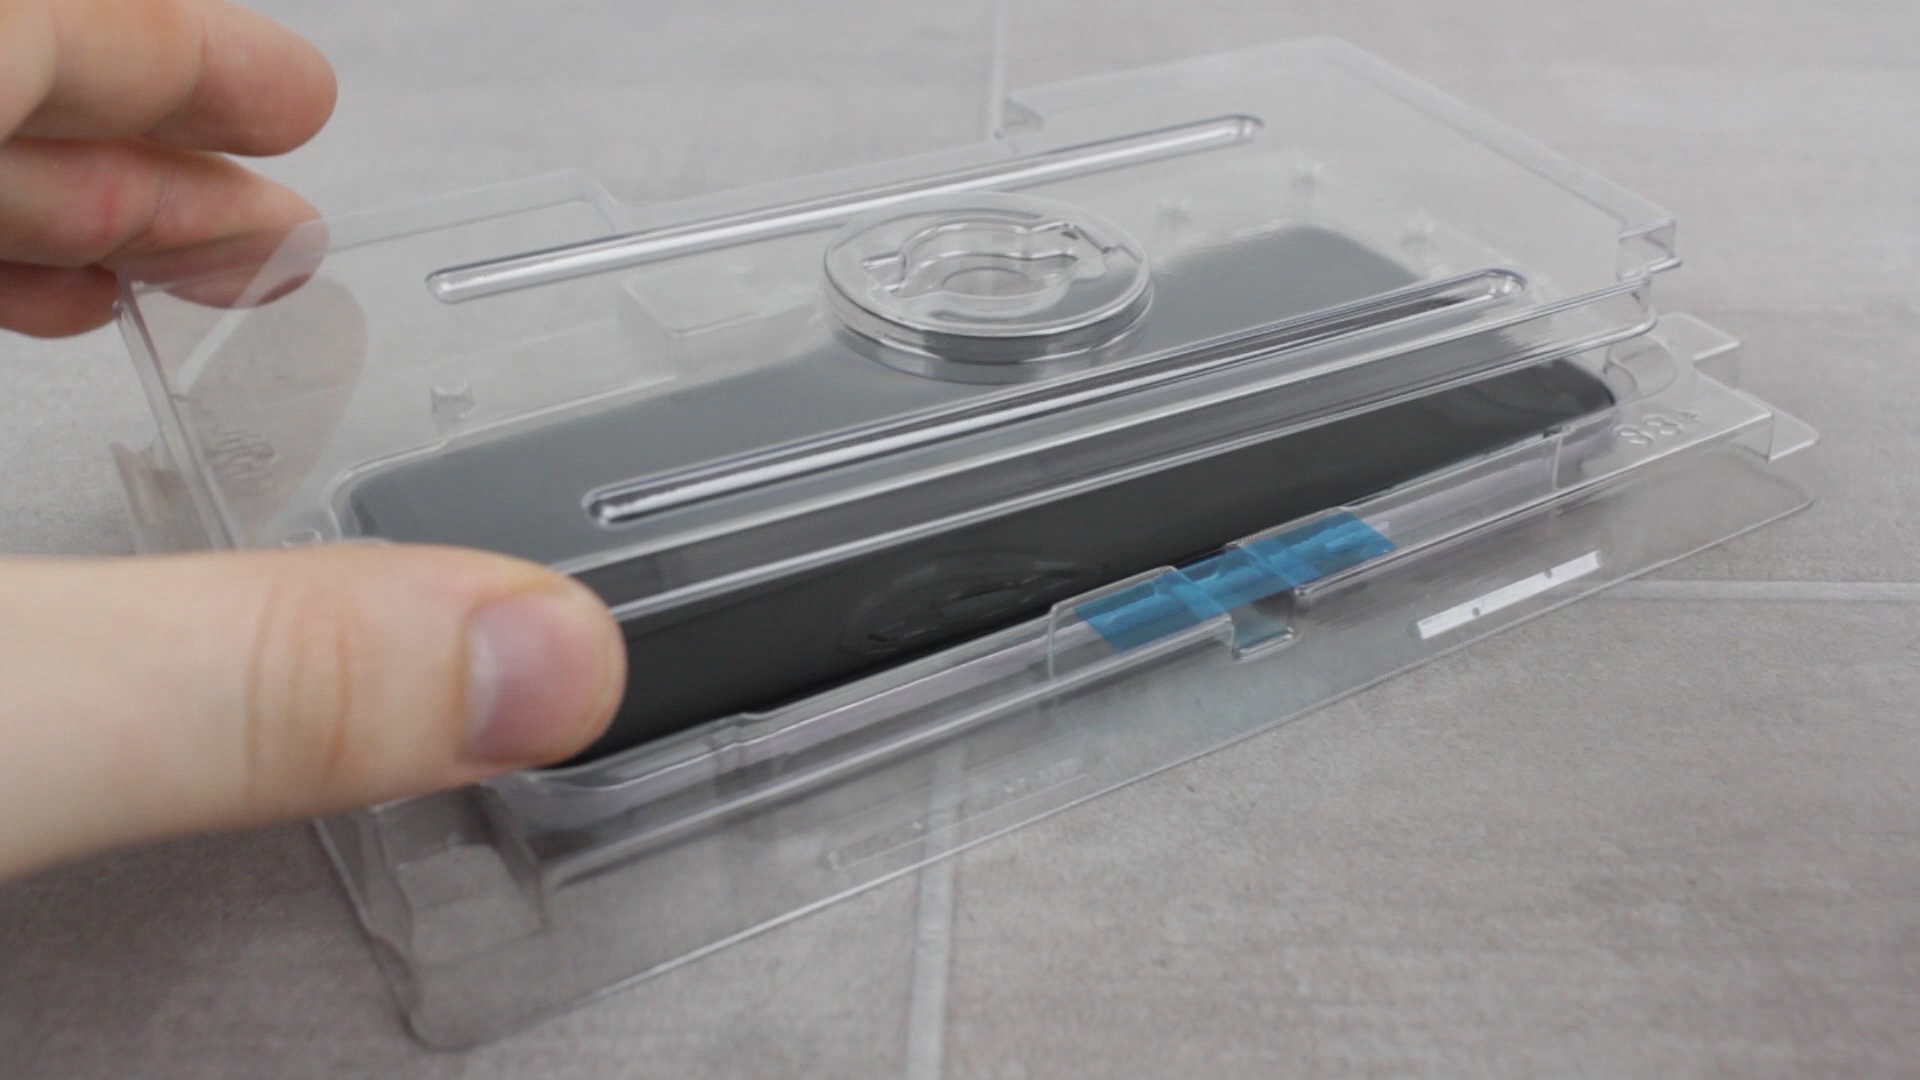
Now that your display is well prepared, you’ll now want to take the top section of the tray and rest it in place over the screen. You’ll feel the lid fit well when correctly in place, so you’ll know when you’ve got it right. When happy, you can then push down the alignment stickers to keep it in place.
4. Insert the bushing adapter into the top of plastic cover
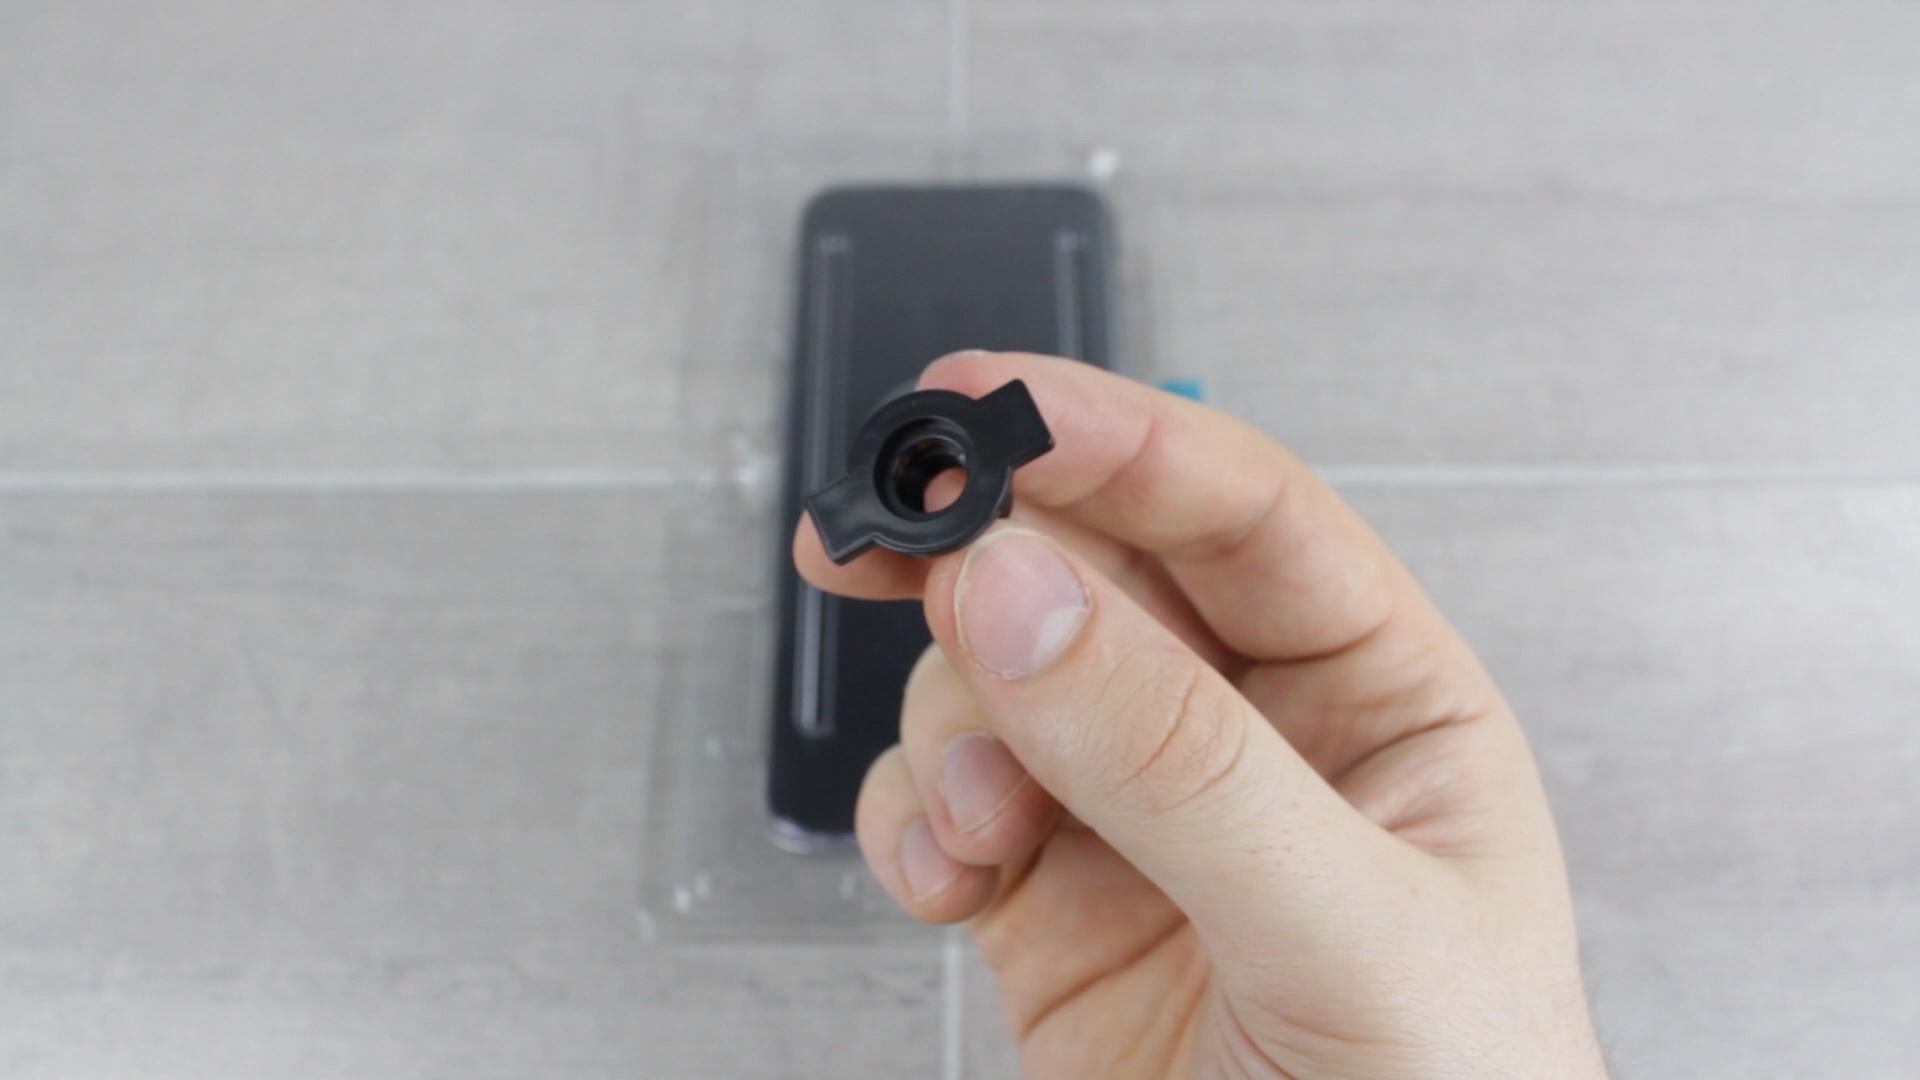
Now grab the bushing adapter and place it into the hole on top of the plastic housing. This will then hold the adhesive vessel in place ready to drain its contents out onto the screen.
Please Note: It’s extremely important at this point to check that your table or desk is level, as you’ll need to ensure that the liquid stays on top of the phone’s screen and won’t run off the edges. You can do so quickly by using the supplied adhesive container. Resting it on it’s side will give you a good indication if you need to relocate to flatter surface. If it rolls, then you’ll need to find a new place to apply the protector.
Warning: If for whatever reason you’ve released the adhesive from the vessel onto the phone’s screen and it’s run off the phone’s display due to the surface not being flat, then please do not attempt any more of the installation. At this point you’ll need to clean your phone off and request more adhesive before you can carry on. If you attempt to continue and apply the screen protector then it will most likely fail and you’ll be left without a protected phone.
5. Remove the large screw top and insert the adhesive bottle into the adapter
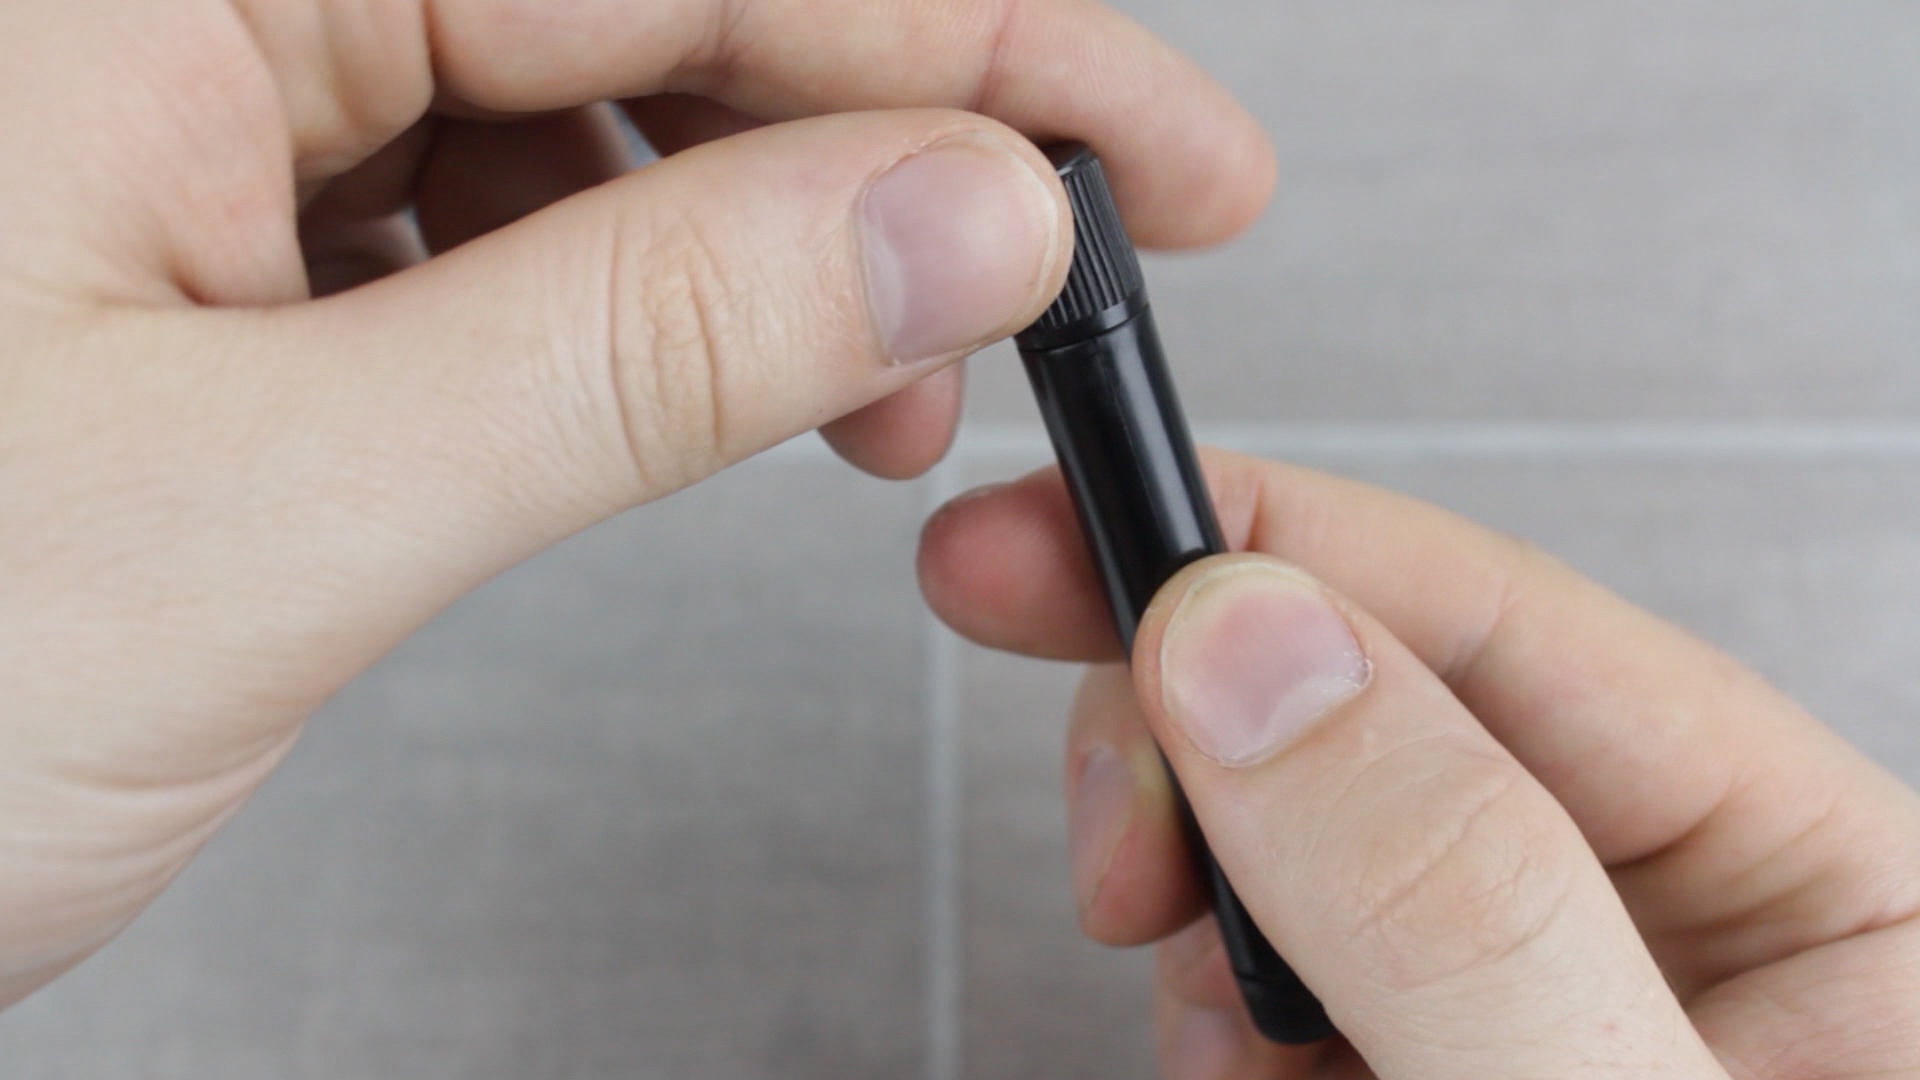
The adhesive bottle features two ends, so be careful that you remove the right end first. You’ll know which to remove first, as it’s the slightly larger of the two screw caps.
When the cap is removed, you’ll then be free to screw the bottle into the bushing adapter. Don’t worry about any spillage as no liquid will be released until you remove the second cap, which should be done once the bottle is screwed into place.
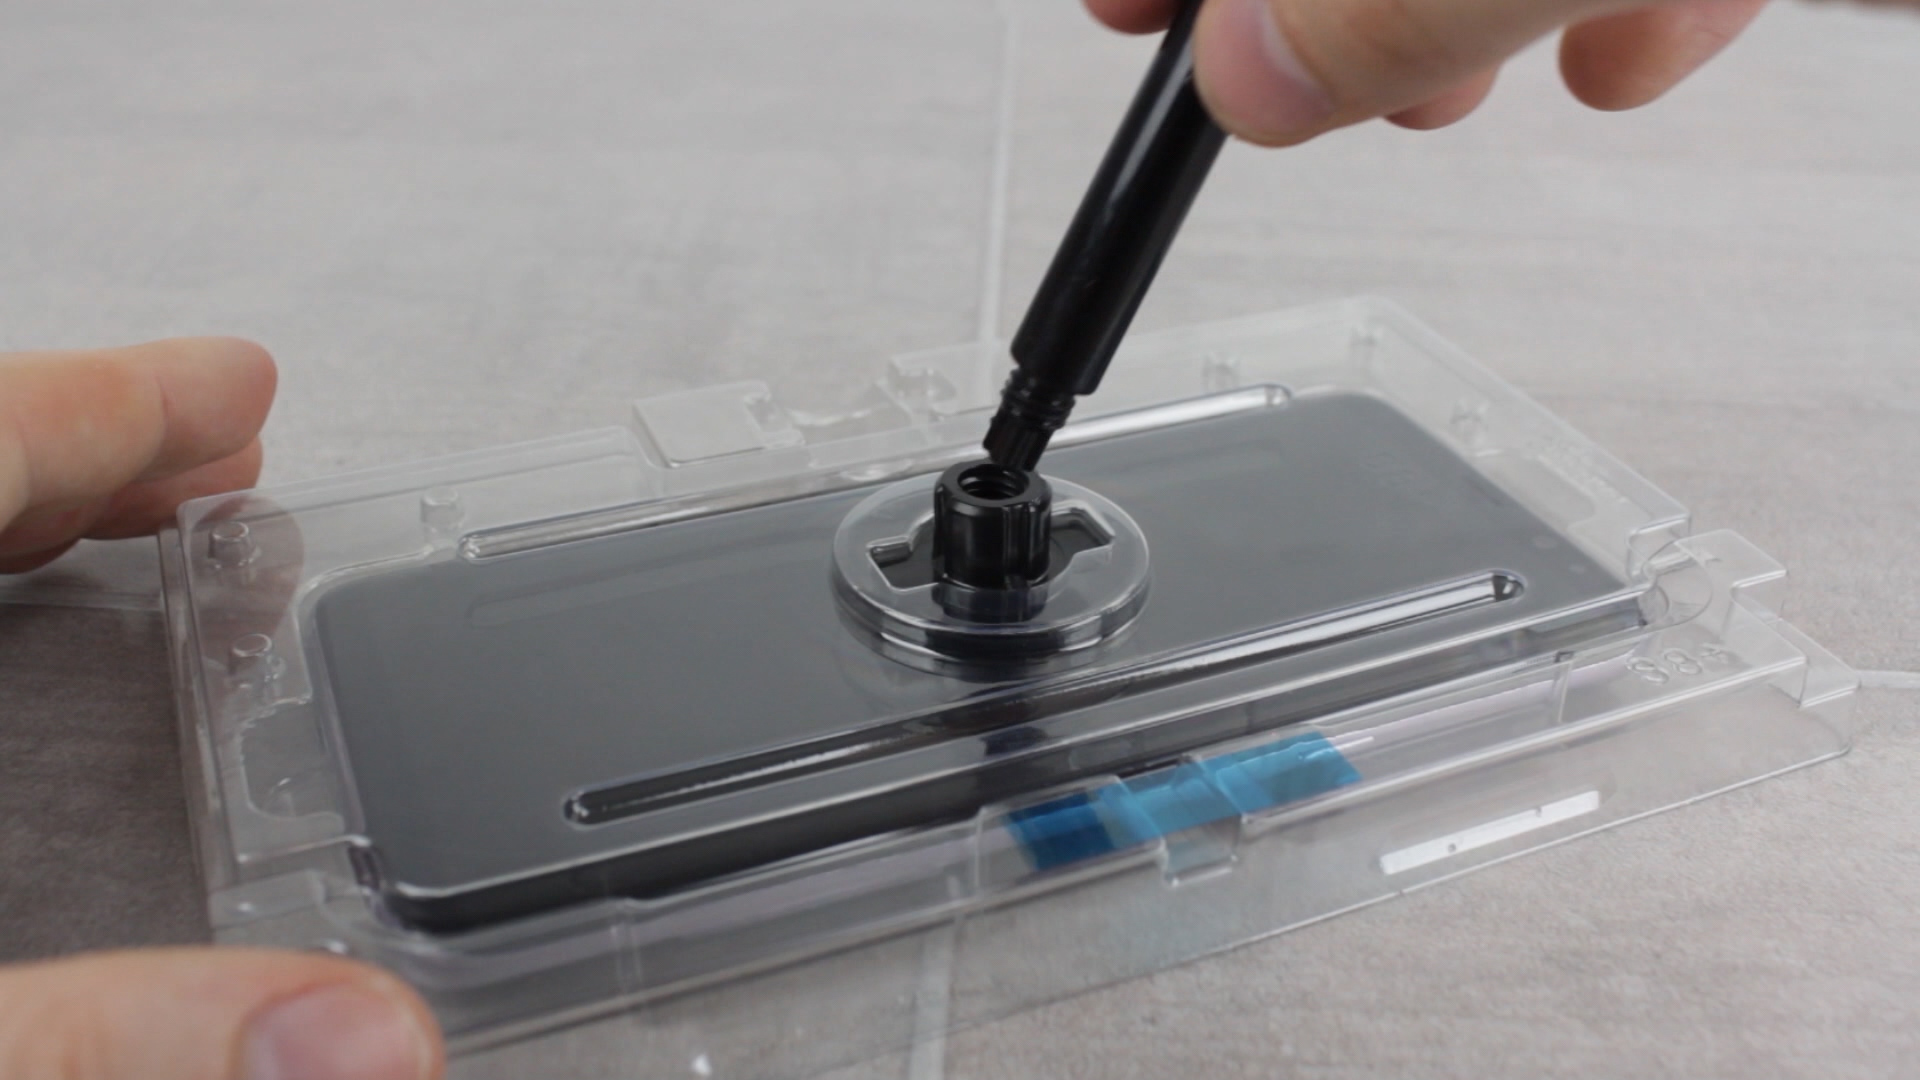
By removing the second and smallest cap, the adhesive will then be free to run onto your phone’s display. You’ll want to leave this to happen for around 30 to 40 seconds, so as to make sure all of the liquid is out and on the phone.
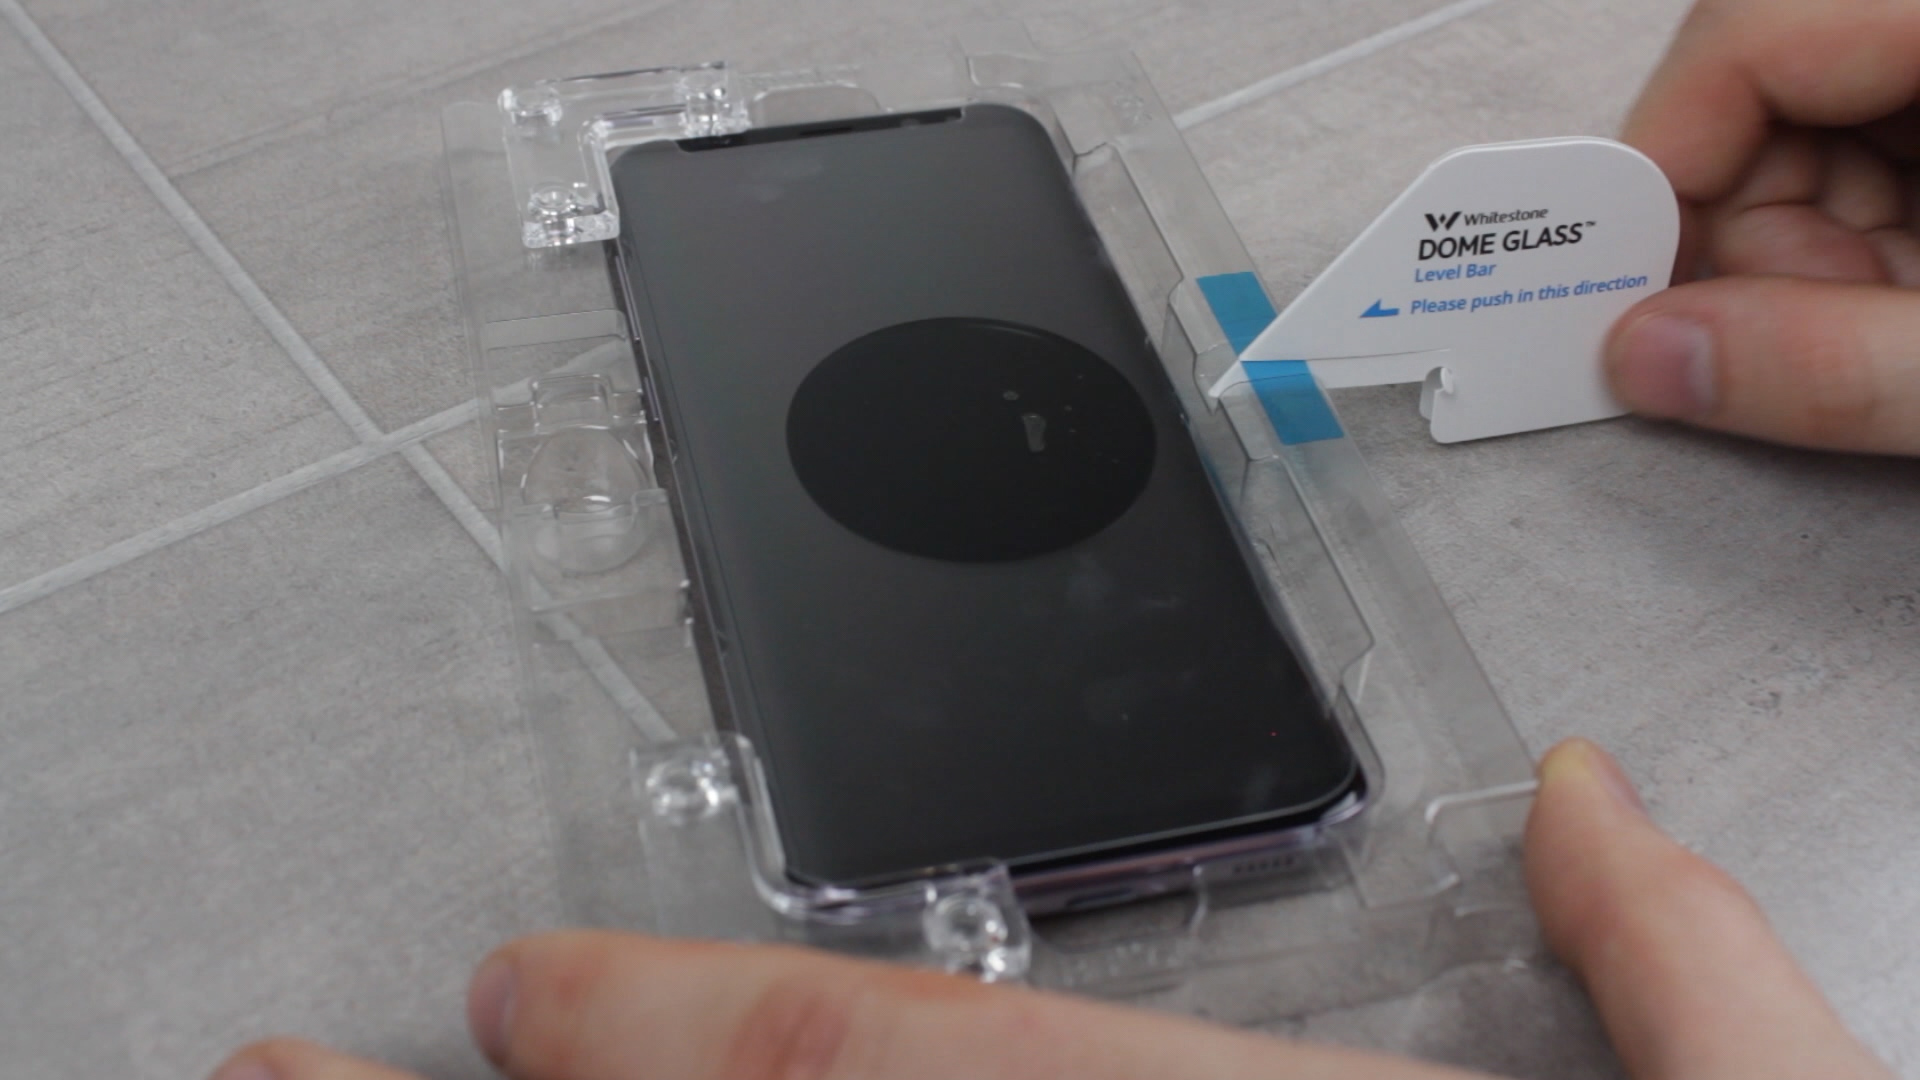
6. Remove the entire top plastic section and add the alignment guides
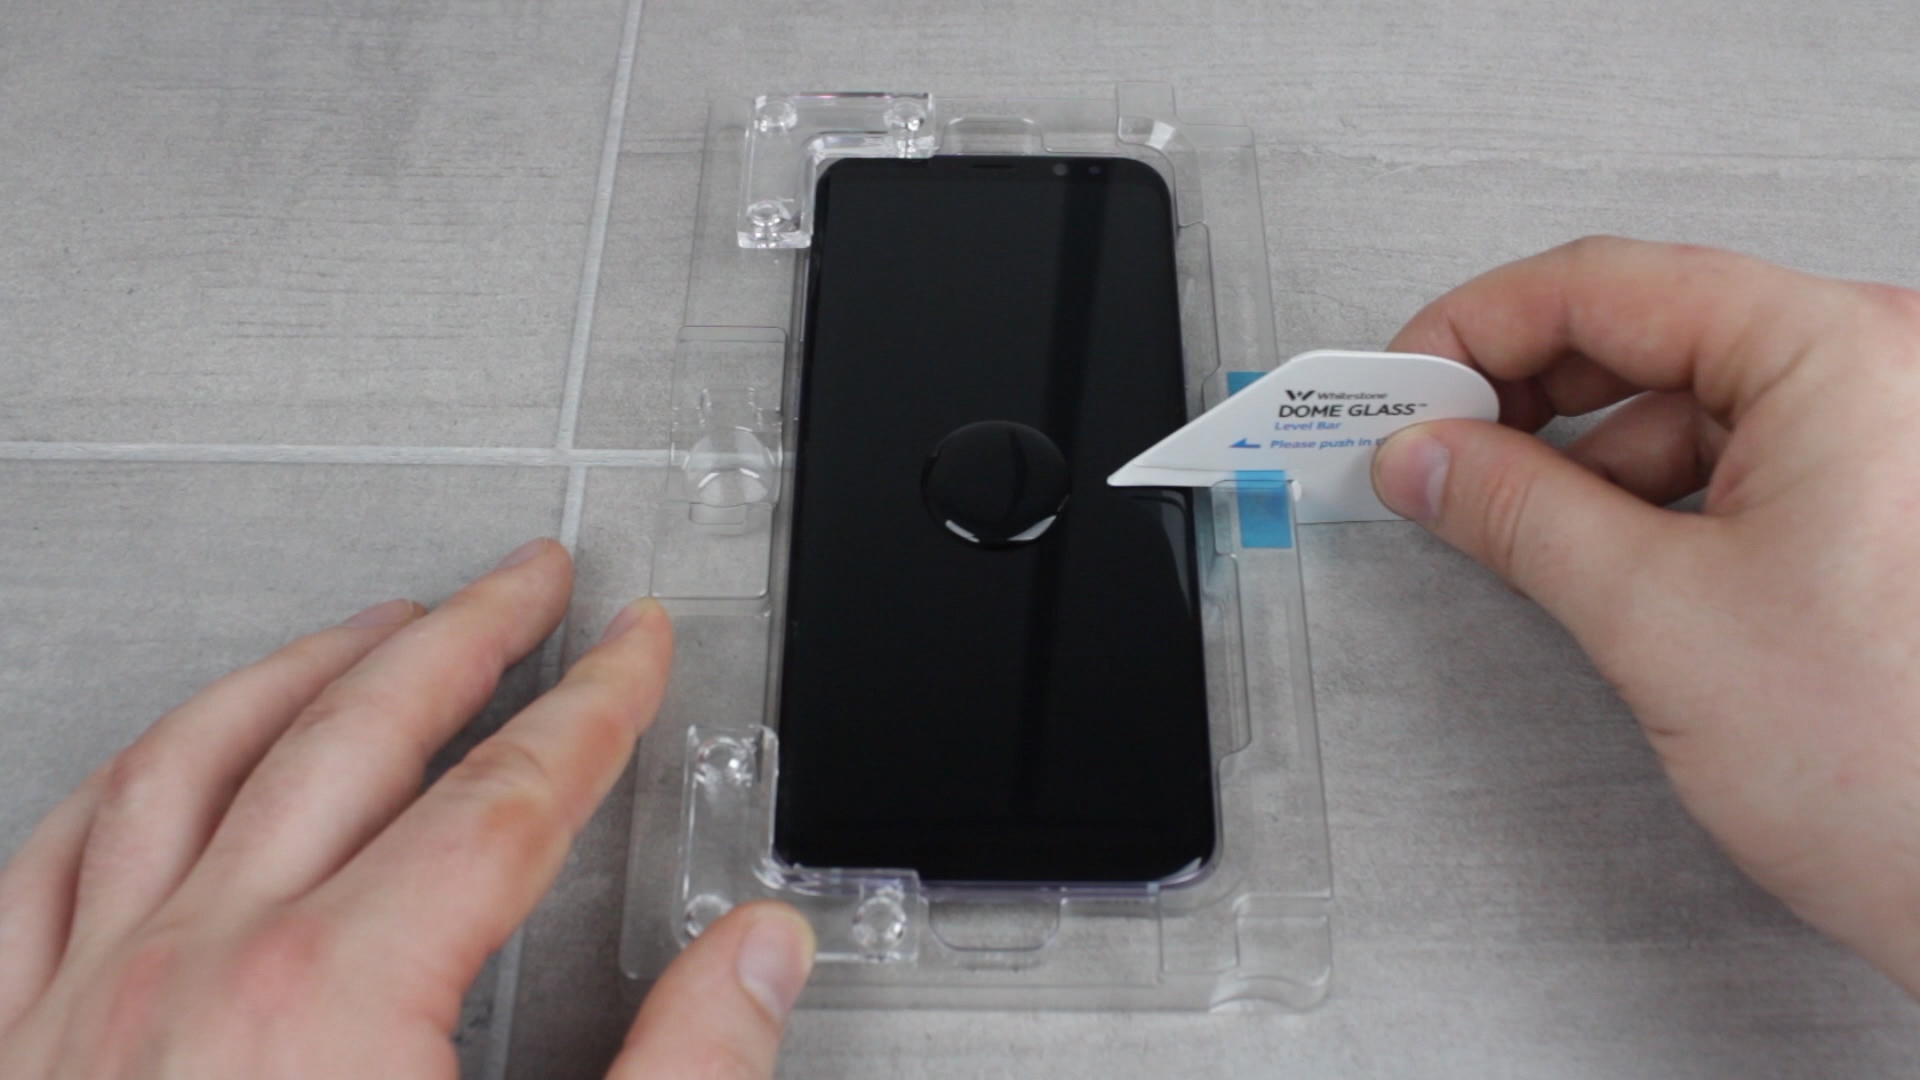
You’ll then be free to remove the entire top section of the kit, leaving you with a screen holding the adhesive drop in the center.
Now you’ll need to take the align bars at the top and bottom of the installation housing, before slotting in the level bar like over the blue tape at the side.
7. Remove the screen protectors plastic film and begin lowering onto the guides
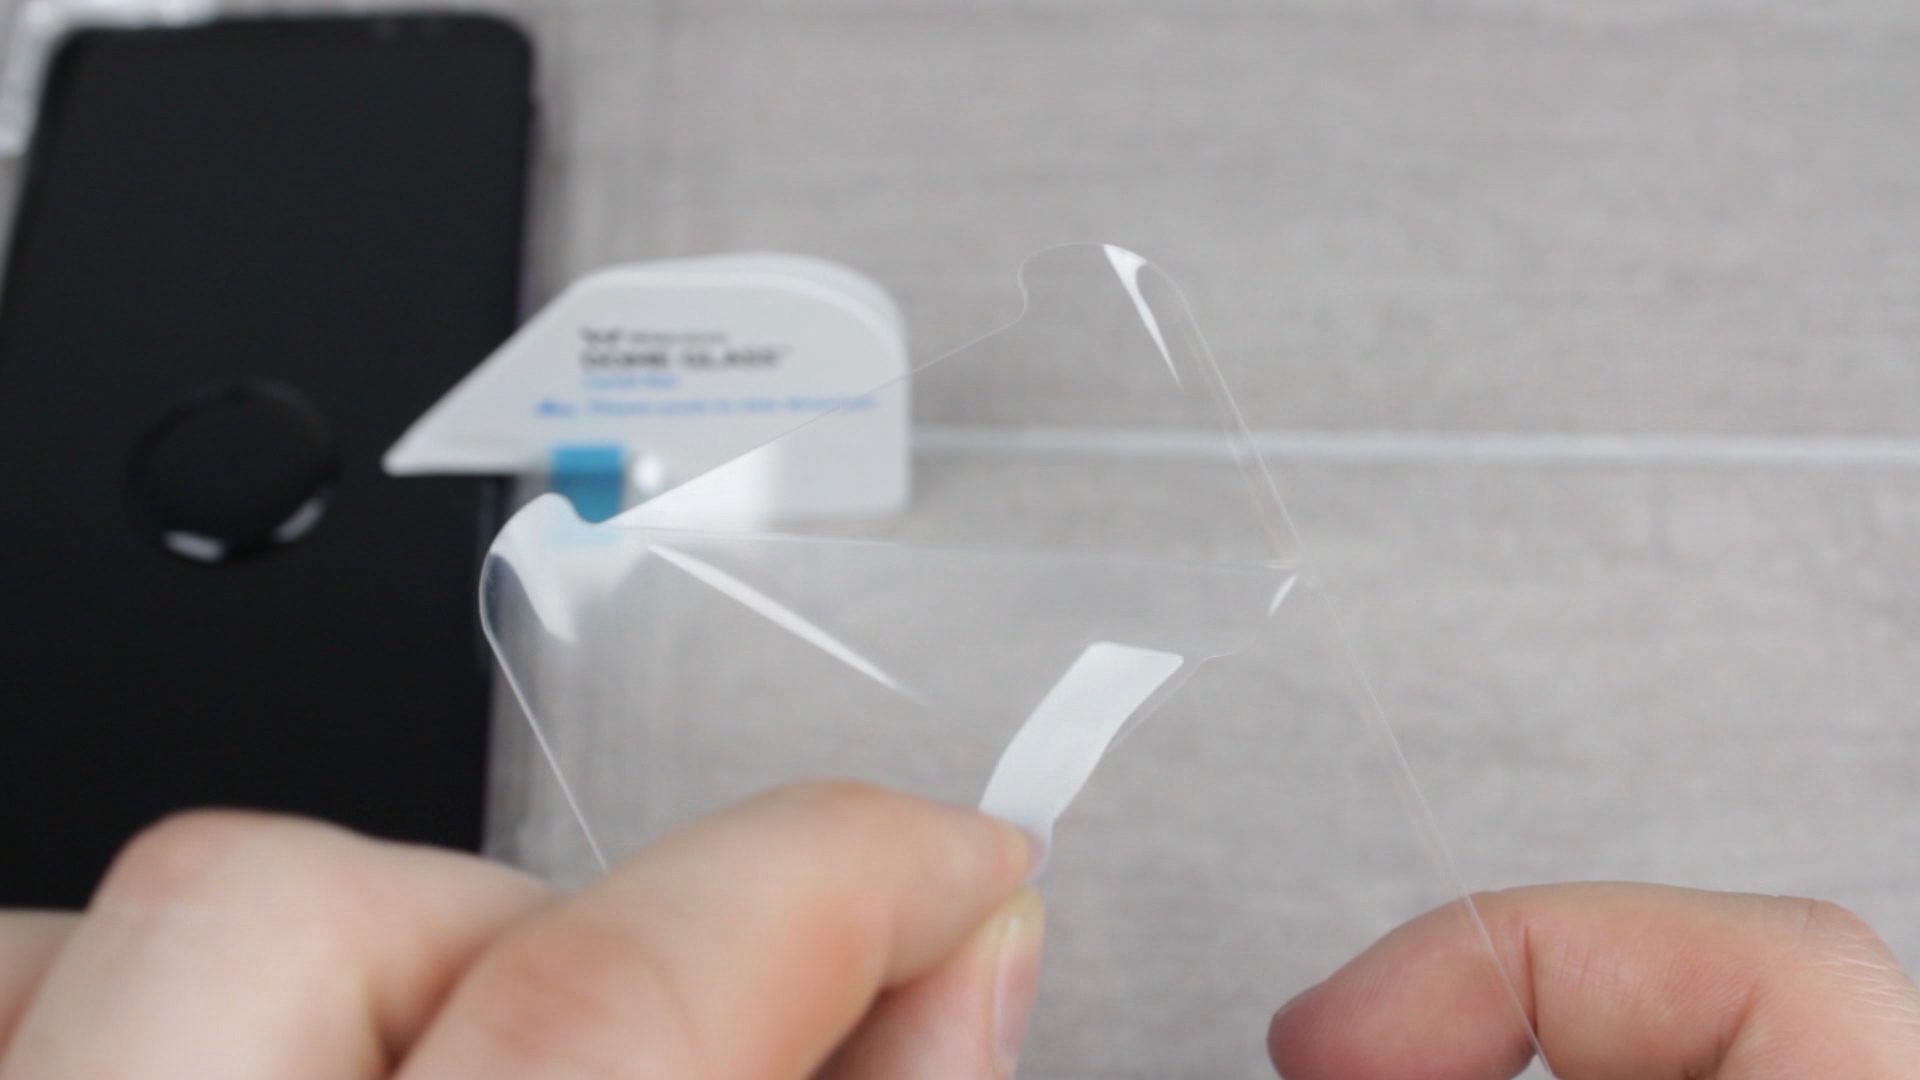
With the top section removed, you can now turn your attention to the screen protector itself. You’ll need to carefully remove the plastic protective film by peeling the blue tab away. Make sure not to touch this side of the protector as you won’t want any fingerprints or dirt getting trapped underneath once applied.
Now you’ll want to take the protector and slowly lower it into place, starting with the left side first, while the right side is lowered onto the guide, so as to ensure alignment without touching the adhesive bubble.
8. Carefully remove the level bar guide and leave for 60 seconds
Once happy with your alignment, slowly remove the level bar until the protector drops. This will cause the protector to fall into place and allow the adhesive to spread throughout the protector.
You should leave your phone in this state for around 60 seconds to a minute and a half, as this will let protector settle and the adhesive spread correctly.
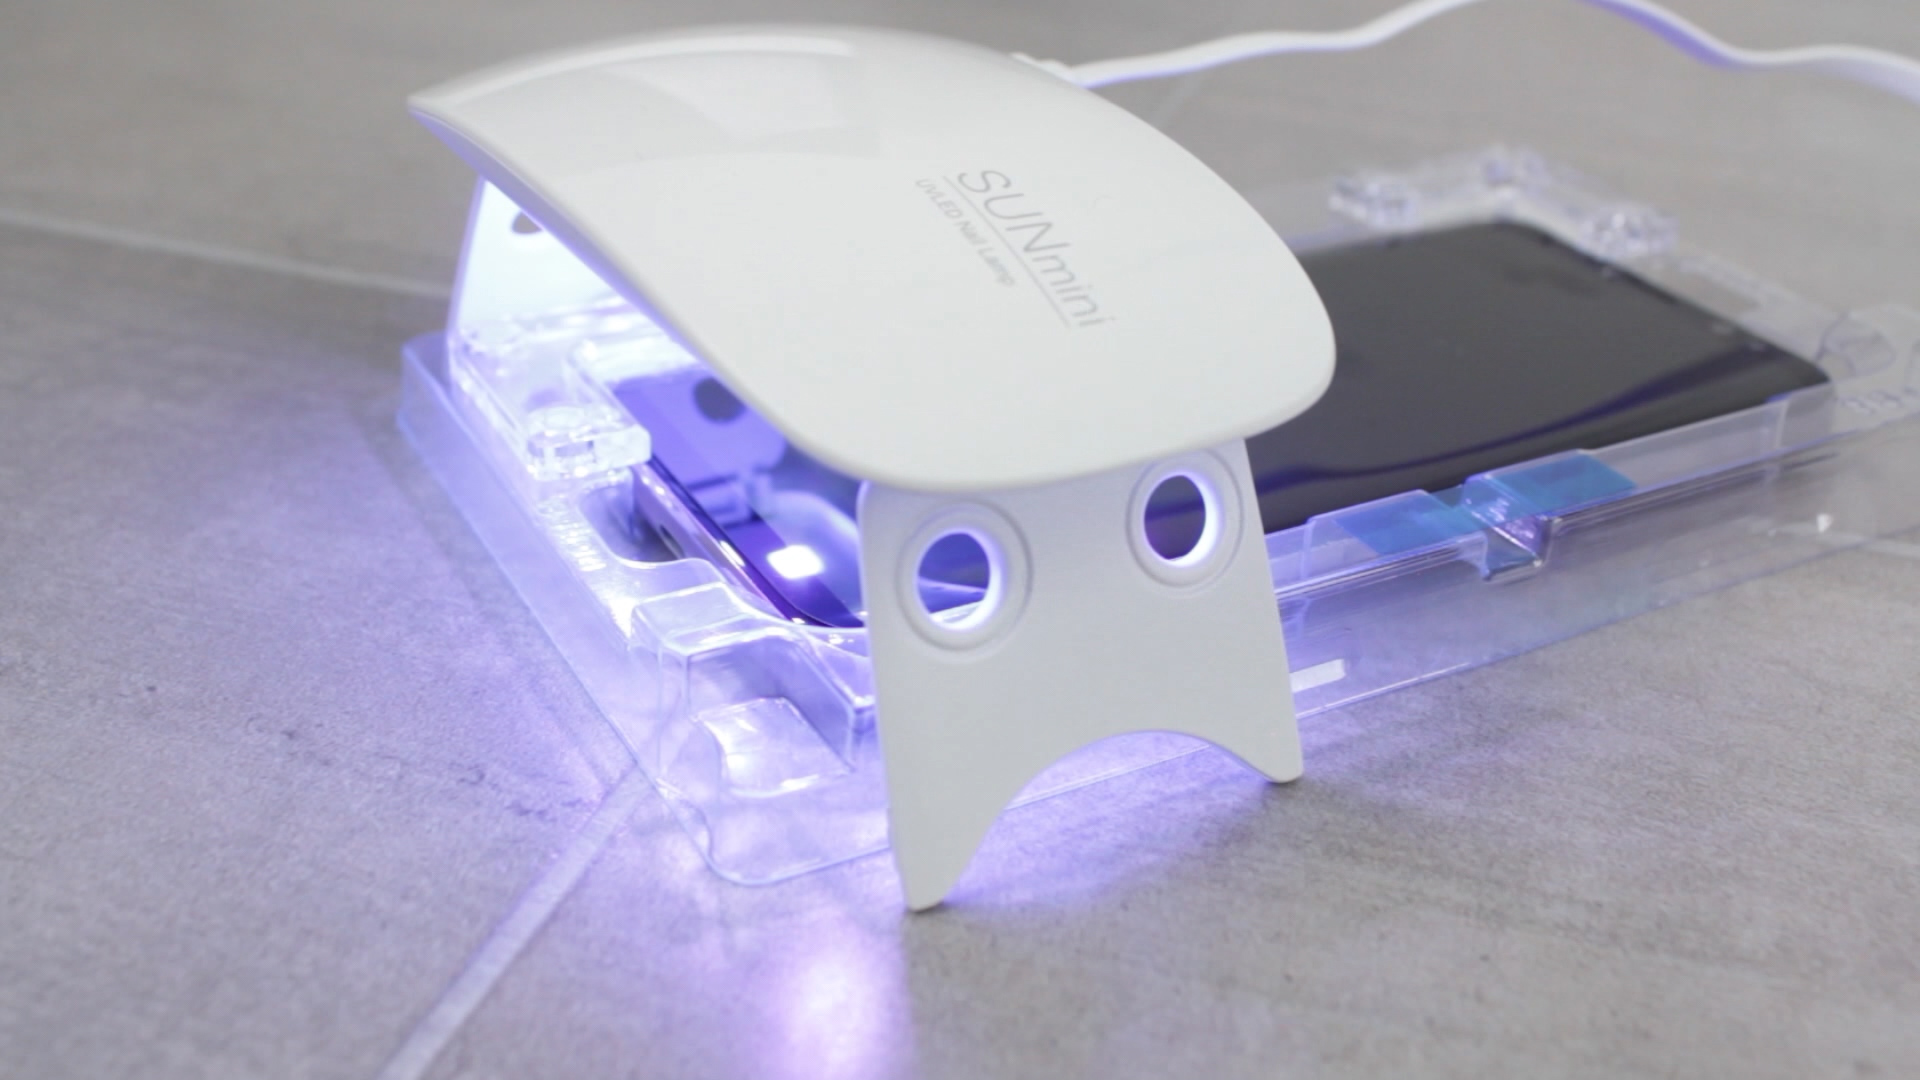
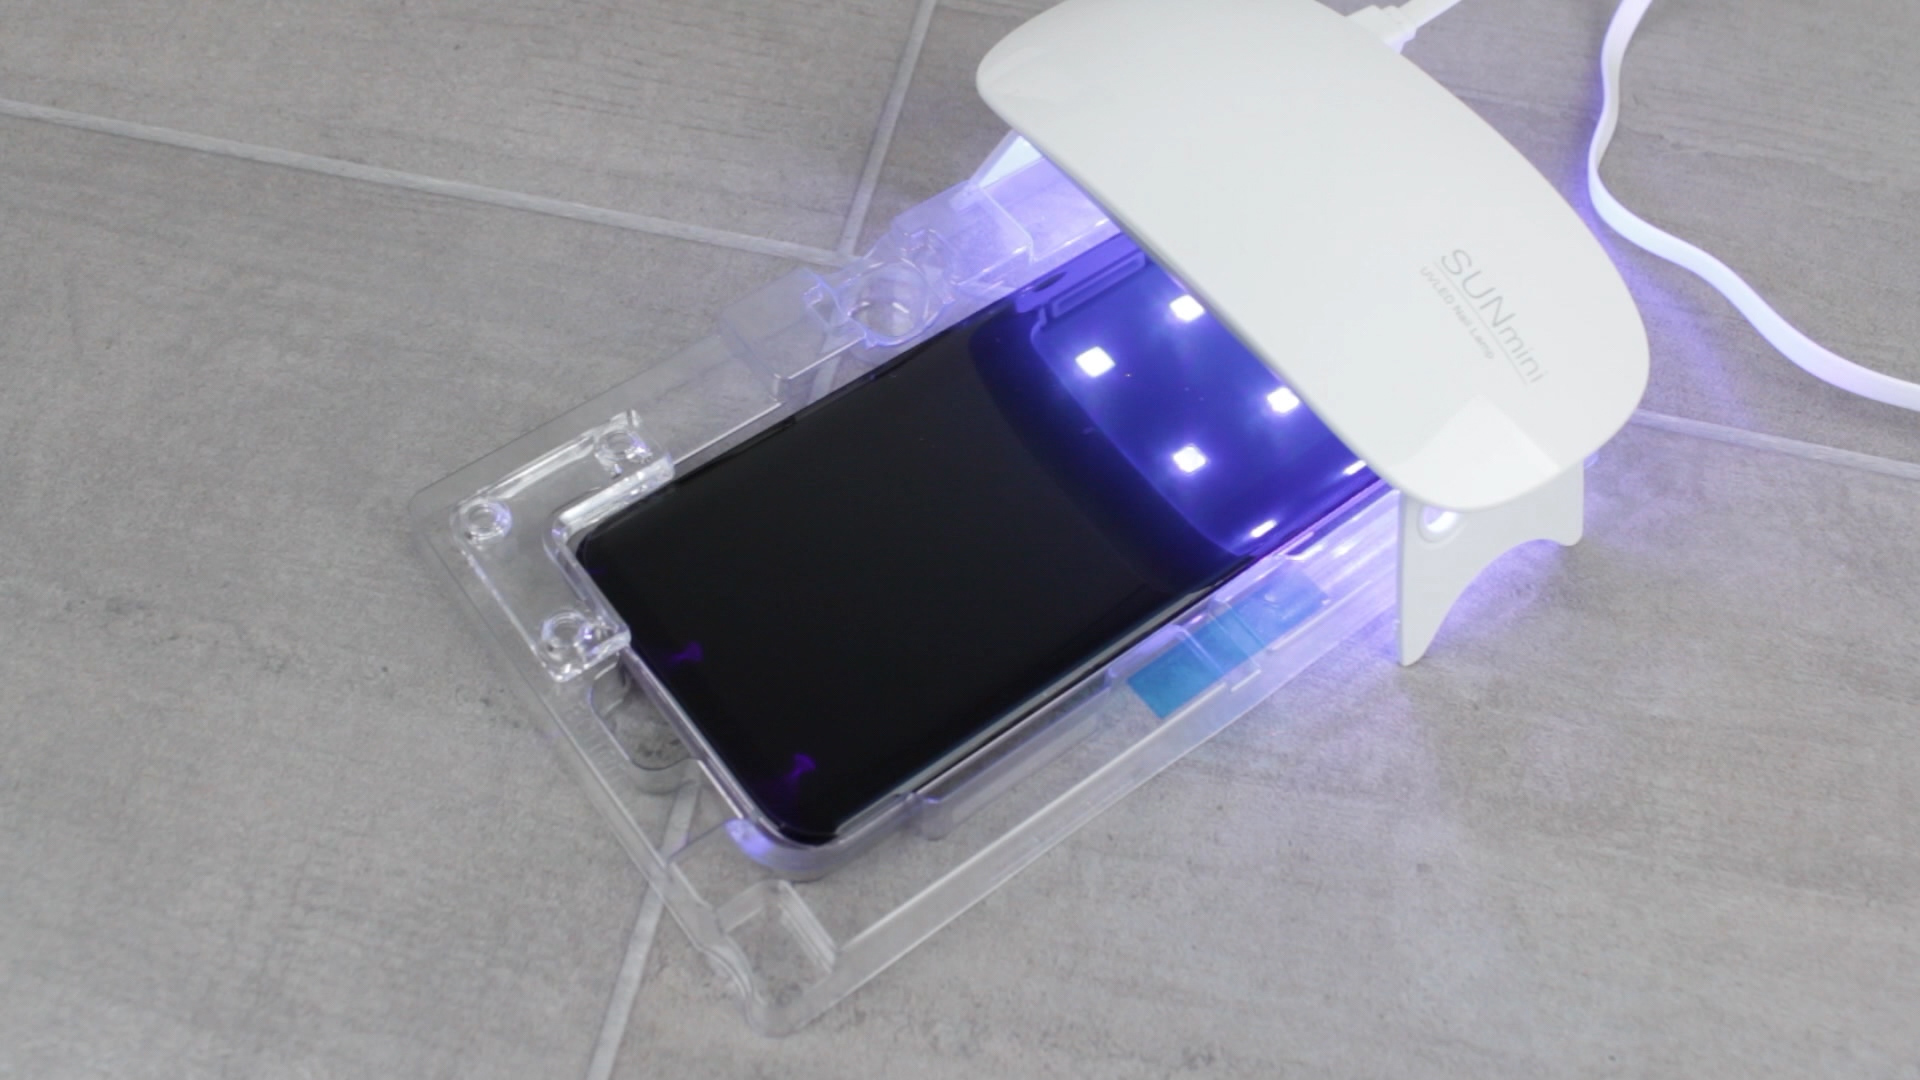
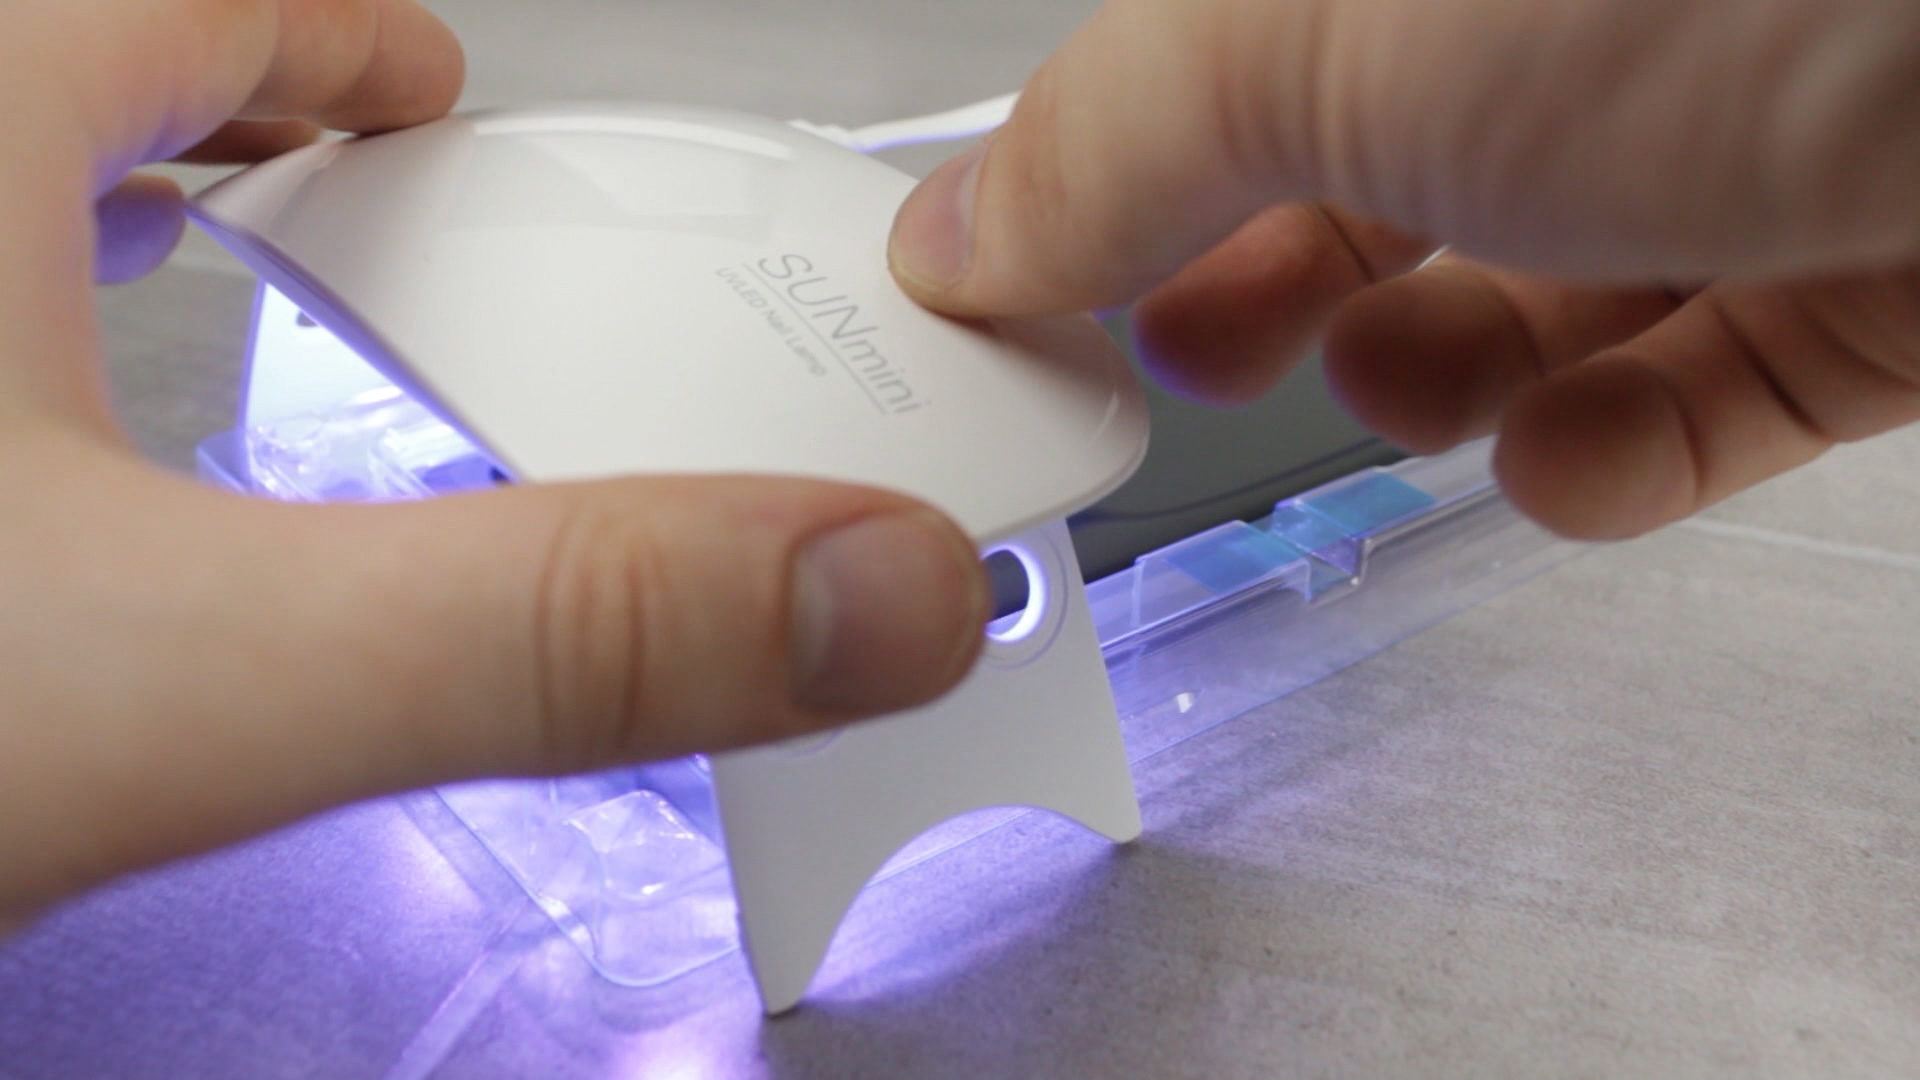
9. Take the UV light and cure the top and bottom of the protector for 20 seconds a time
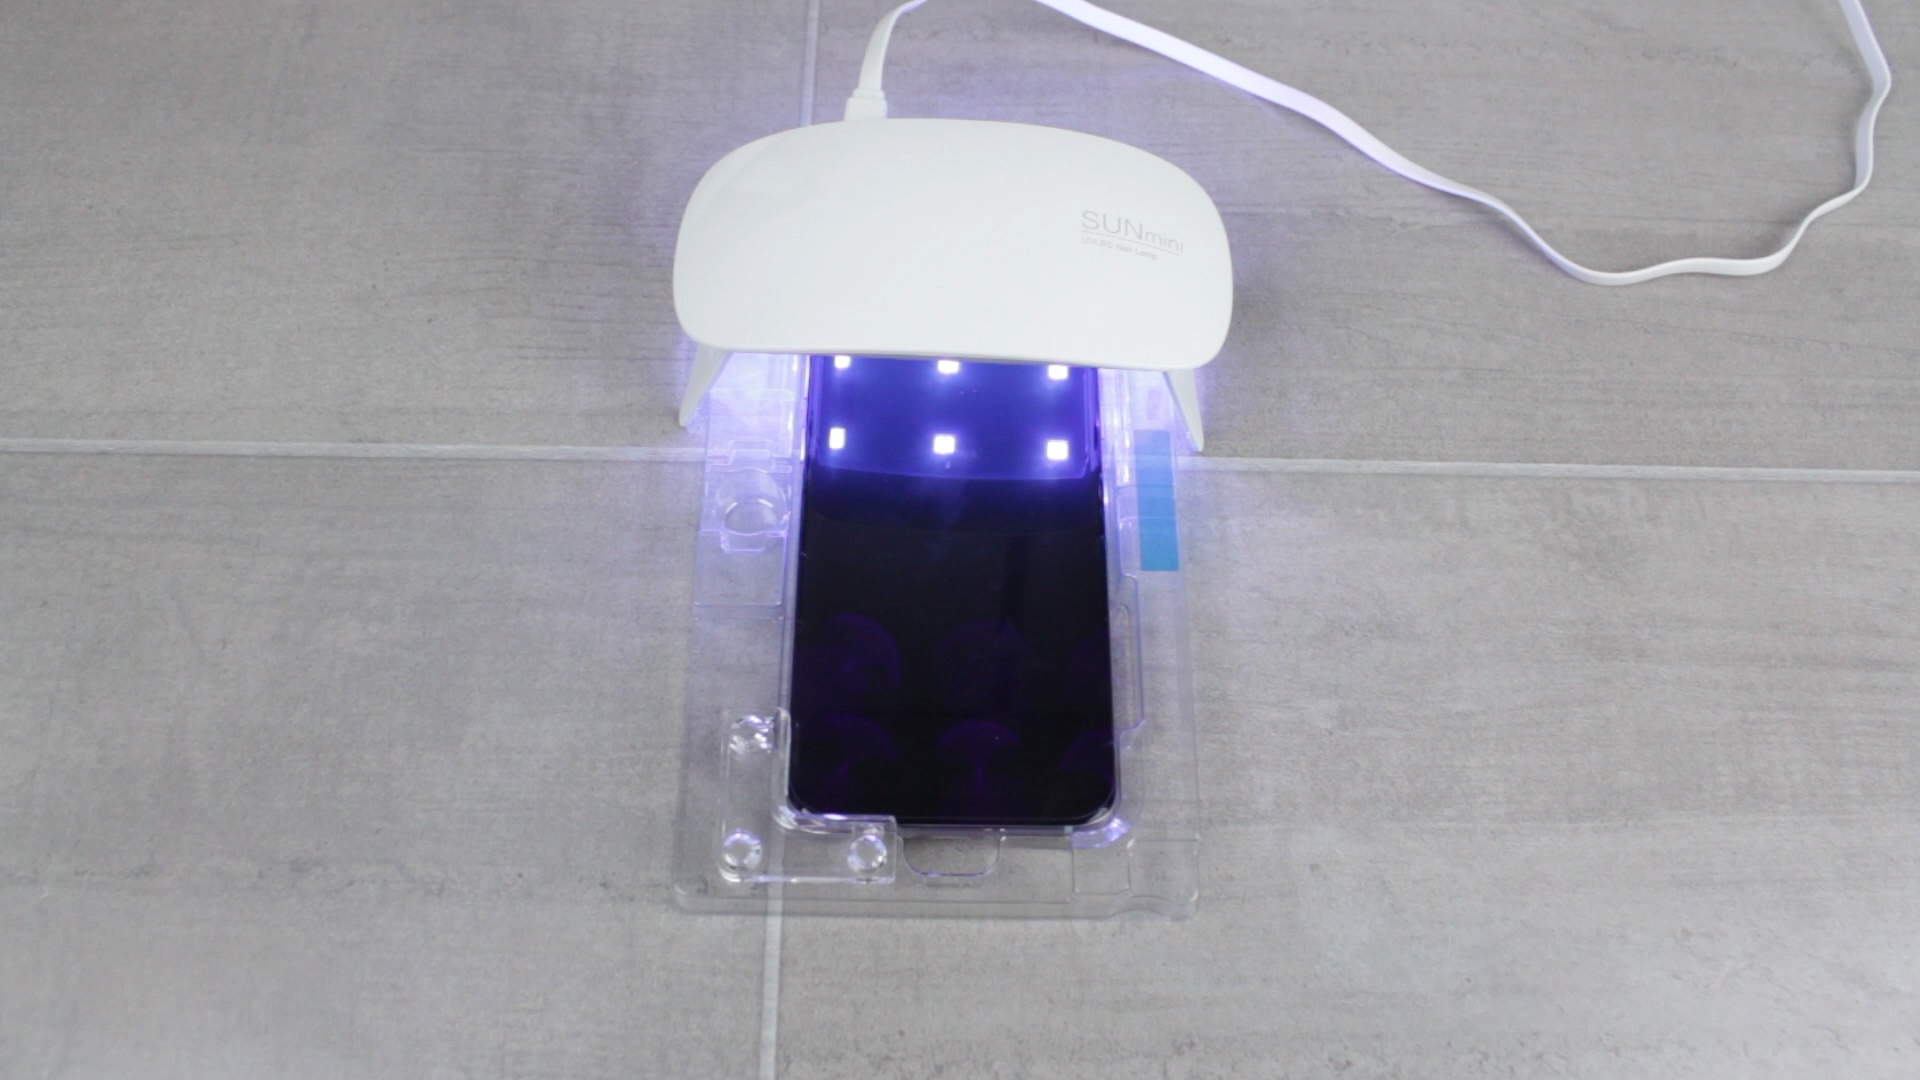
Now with the UV light powered on, you’ll want to a cure the top part of the protector for around 20 seconds, although a touch longer won’t hurt. Then move the UV light down to the bottom section of the protector for another 20 seconds or so.
10. Set aside the UV light and begin cleaning the protector
After curing the protector for the first time, you’ll then need to move the UV light away and take your second alcohol wipe and provide the protector’s surface with another solid clean, before drying it with the microfibre cloth.
Warning: Be careful not to apply too much pressure when cleaning during the cleaning and curing stage. Excessive pressure, especially at the edges of your device, can cause the adhesive to become compromised and lead to the protector lifting off at the edges in future.
11. Cure the protector again for a further 10 seconds
Once cleaned and dry, then repeat the curing process by providing a further 10 seconds to both the top and bottom of the protector with the supplied UV light.
12. Clean the protector once more with your final alcohol wipe
Now you’ll want to repeat the cleaning process as you did just a few moments ago, by using the final alcohol wipe and then drying your screen with the microfibre cloth.
13. Cure for the top and bottom sections for the third and final time

Provide a further 10 seconds of UV Light exposure to the top and bottom sections of the screen protector, after which you’ll have completed the installation process!
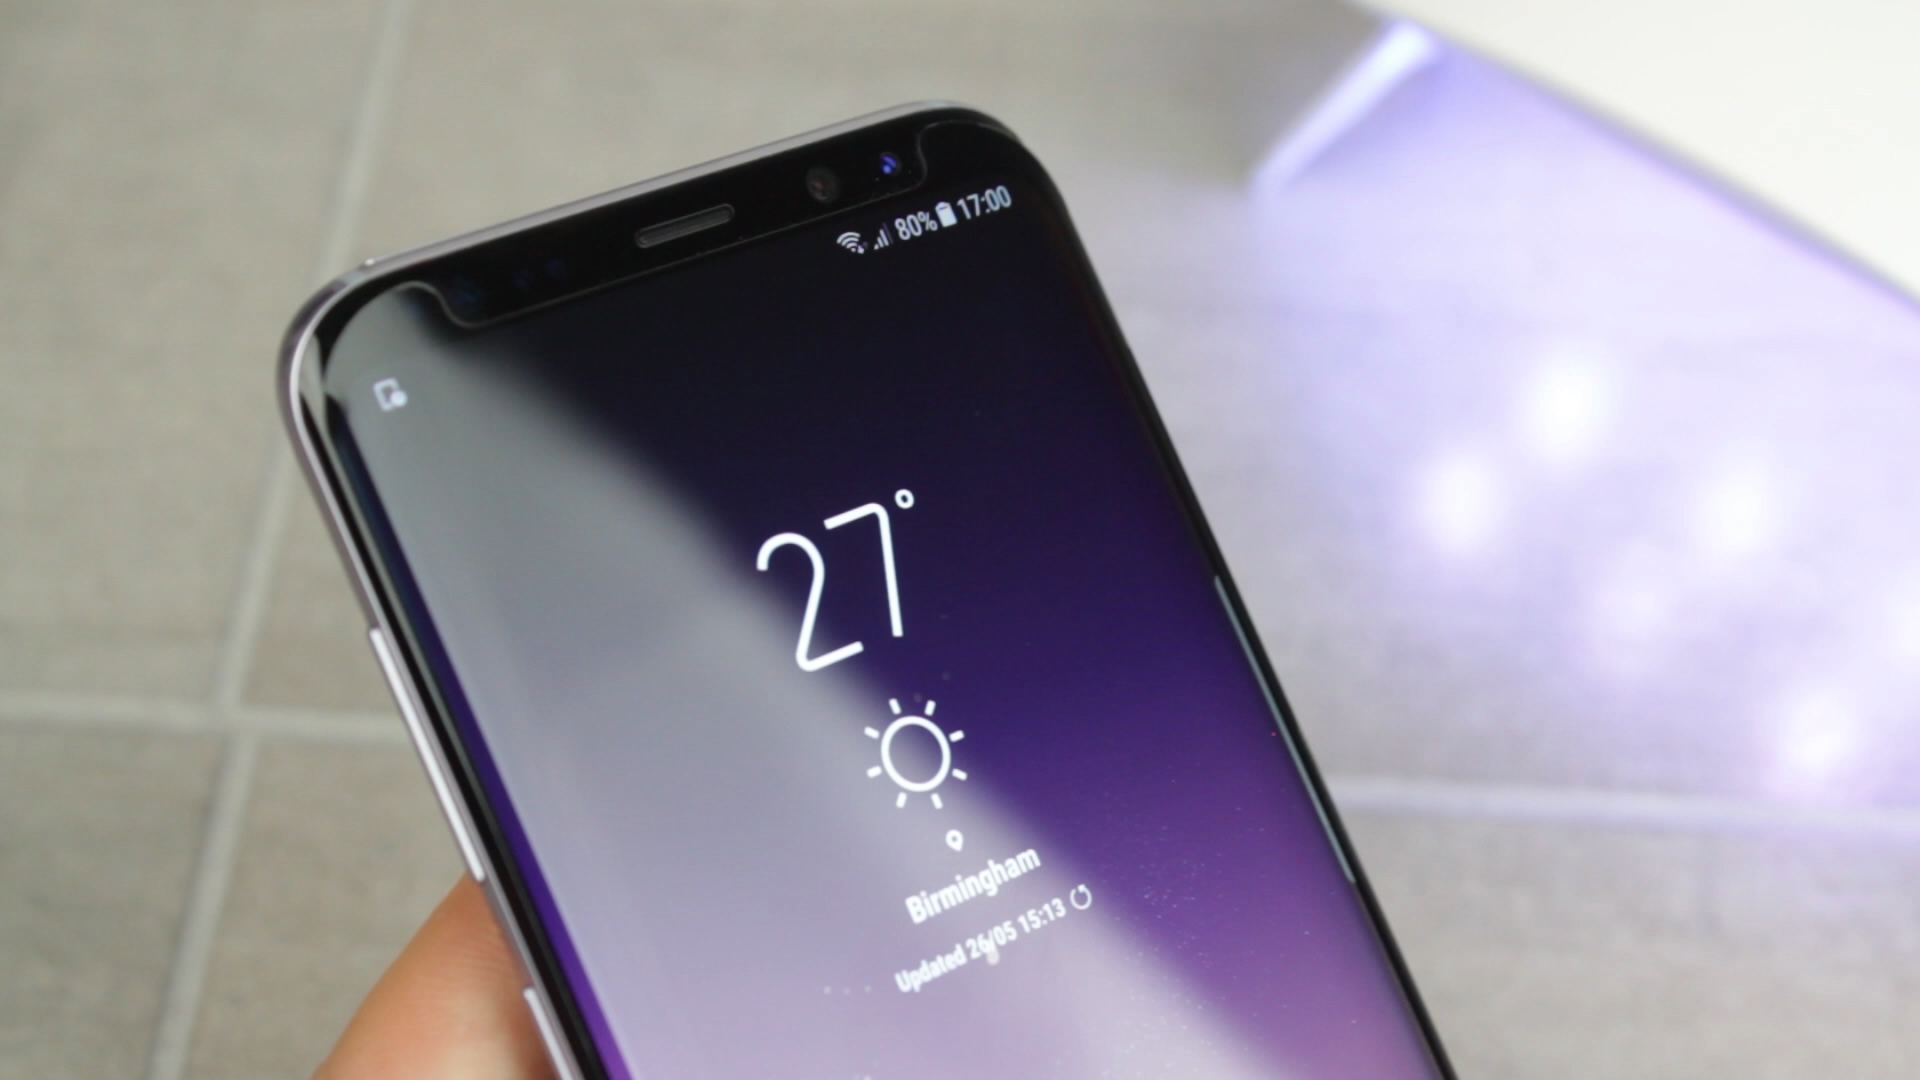
14. Remove your phone from the tray and enjoy your crisp and perfectly applied screen protector
Now all that is left to do is simply remove your phone from the tray. We would recommend leaving your case off for an hour or so as this will allow good time for all of the adhesive to dry, keeping the protector firmly in place and ready for daily use.
Wrapping up
Thanks for checking out our article on how to correctly apply a Whitestone Glass Dome Screen Protector. If you have any questions, then feel free to ask below and if you’re interested in purchasing one of these protectors then please see our selection here.
Your installation is different to manufacturers, they remove the bottom align bar, also they remove the phone and clean the sides etc, you don’t after 1st and second curing. If you don’t clean it, doesn’t glue stay behind and pull later?